Showing posts with label Tutorial. Show all posts

Wednesday, November 19, 2014

Pokemon Inspired CHARMANDER Daily Style and Makeup Tutorial & Style Transformation Video

Hiiiiiii!!! :D Today is very exciting! I haven't done a makeup tutorial for a Daily Style look since my third video ever, My Neighbor Totoro Inspired Makeup Tutorial. BUT after I got these sweet Charmander kicks from Catherine LaPointe and RockStar Wigs Triflect in Screaming Crimson... I knew I just HAD to make a tutorial for one of my most faaaaaavorite Pokemon! Charmander! XD


Daily Style Link List~

Hat: Target

Charmander Bow: Kawaii Blaby Pokemon Anime Original Charmander Bow 

Charmander Pin: Sakuradragon Pokemon Generation 1 Pin Set

Hair: RockStar Wigs Triflect Collection in Screaming Crimson

Top Lashes: Dolluxe #6 Whiplash Attack

Bottom Lashes: Dolluxe #8 Underlash B

Contacts: PinkyParadise.com Super Size Nudy in Green

Shirt: Kelz Boutique Charmander Pokemon Inspired Black Crop Top

Jacket: Forever 21

Shorts: ROMWE Shredded Black Denim Shorts

Necklace in belt loops: eBay
Can't find the actual one, but this one is very similar-

Flame Tights: Superfs Club Party Flaming Flame Print Sheer Tights Nude

Shoes: CatherineLaPointe Custom Pokemon Cartoon Painted Canvas Sneakers
(USE CODE "ALEXA10" FOR $10 OFF CUSTOM SHOE PURCHASE)


Tuesday, October 14, 2014

Maleficent Halloween Makeup Tutorial

Hello, cutie buns! Week two of my Halloween makeup tutorial series... MALEFICENT!
As one of the year's top movies, I figured Maleficent would probably be a character that many people will be for Halloween this year. Personally, I love the new take on the story of Maleficent. What do you think of the new tale?


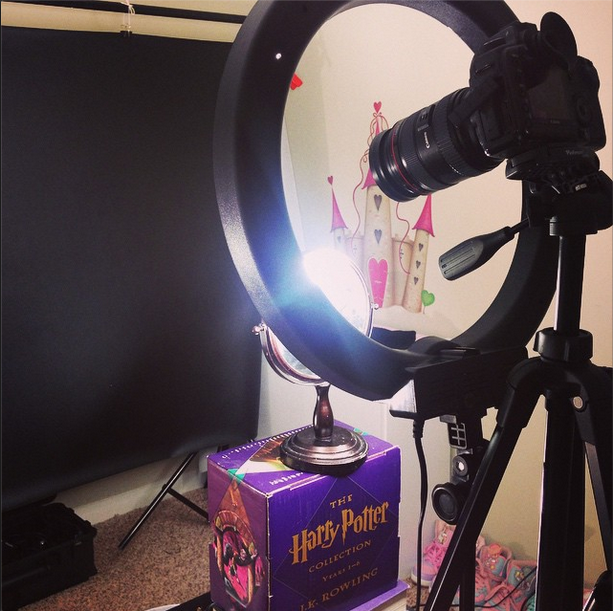
I got a new light (finally!) which means this is the first tutorial that I've been able to shoot away from my bathroom lighting! Hehe... I'm sure that is a relief! I am excited because it gives me the option to use different backgrounds for different videos. I shot my Maleficent tutorial against a black background and can imagine that it would not have the same effect at all against my white shower curtain. XD


I am still learning how to use the light along with my camera settings, so a few moments of the tutorial are a little brighter than I would like them to be... but hey! Learning curve. It will be better next time. ;D I added a bunch of cool special effects and editing to make up for it. ;)

Check out my newest tutorial, Maleficent Makeup Tutorial, NOW:


Stay tuned! My next tutorial is my all time favorite Disney villain! Any guesses?
xo

Monday, October 6, 2014

Sally (Nightmare Before Christmas) Halloween Makeup Tutorial

Hi, loves! Last week I put out the first tutorial of my Halloween series, Sally from the Nightmare Before Christmas! I am sooooo excited for Halloween that I am going to be posting Halloween tutorials every week in October. Yessss! Some of the best Disney villains and Halloween costume favorites are to come! :D

Starting off the series is one of my favorite Halloween characters,
Sally (Nightmare Before Christmas) Halloween Makeup Tutorial


Check back later this week for the next tutorial! Stay spooky! xx

Monday, August 25, 2014

Disney's Frozen Inspired Cosplays & Tutorials

Hi everyone!! Oooh my goodness! I am sooo behind on blogging! YIKES! I have been super busy running my YOUTUBE CHANNEL, which has been SO much fun! If you haven't checked it out yet, you really should. It is full of fun, colorful things.

I also really want to do a blog post about my time at HYPER JAPAN in London! Why is there not more time in a day??

For now, check out my Princess Anna and Queen Elsa cosplays from Disney's FROZEN!


AHHH!! I love, love, loveeee Frozen!
If you want to see tutorials on how I achieved these Frozen looks (and even if you don't), you should watch these tutorials below ;)


I hope you like my Frozen cosplays & videos! Please subscribe! Lots more coming soon. xoxo

Wednesday, June 11, 2014

Mermaid Makeup Tutorial!~*


Hehehe hello to all of you cute people of the world! Making videos for my YouTube channel is quickly becoming my favorite hobby! Check out my newest video: Mermaid Makeup Tutorial!


xoooxoxoxoxo

Wednesday, May 21, 2014

**NEW VIDEO** The Legend of Zelda: Female Link Cosplay Makeup Tutorial by Alexa Poletti

Hi guys!!! FINALLY, a new video!!! & in this viddy, I am transforming into one of my all time favorite characters. :3 I'll just leave this here....


Ever wonder what behind the scenes of my makeup tutorials looks like? Here ya go:


& for behind the scenes photos of my Link promo shoot with Meschantes x Pinero Photography, keep on keepin on:


Thanks for checking out my new video!! If you like it, please comment, subscribe, and share!!! I love you all & thanks so much for supporting meeeee xoxoxo

Friday, April 25, 2014

How to be a Blogger - Starting a Successful Beauty or Fashion Blog by Alexa Poletti


Hello cuties! Following my Beginning Modeling Guide, I had tons of requests to write a blog post about how to be a blogger. So, here I find myself writing one for you. Please note that I've done almost no research on the topic, so take what you read here lightly. One day I just started a blog, and I have just figured it out as I went. Also note that this whole post is based on starting beauty/fashion blogs, but you can apply many of the same principles to blogs about other topics. So here are my tips, tricks, and guidelines I follow on my blog. I hope you enjoy them, find them useful, and start a kick-ass blog.

Choose Your Host:
Where you choose to host your blog is totally up to you. Personally, I use Blogger because I like its design, I find it easy to use, easy to customize, and because Google search engine seems to crawl Blogger blogs pretty regularly when showing results. But, you know, Blogger isn't the only one out there. I host my photography blog on Wordpress. So it's really just whatever your preference is.


The appearance of my blog is just a standard Blogger template that I've customized to be pink and bubbly with a navigation bar across the top. I love all of the customization options. Remember, if your blog doesn't look visually appealing, no one is going to stick around long to read what you have to say, so make sure it looks good!

Here are screenshots of what some of the customization options look like:


You can also add Google AdSense to Blogger blogs so that you can use your ad space to make a (very little) bit of money from your blog.


A lot of people don't know about this feature! If you go to your dashboard, you click "Earnings" on the side bar. Then you can apply for Google AdSense account. Google will then review your blog and decide if they think your blog would be a good fit for them. If you are approved, they can place ads on your blog and will pay a small amount for the ad space. Google is looking for blogs that are updated regularly, have a decent following, and have a topic so that they can place related ads. Google AdSense is not something you should try to apply for until after your blog starts getting decent traffic. But even if you get approved, don't expect to make a lot of money from your AdSense ads, but hey- every little bit counts!

A lot of people ask me why I don't use Tumblr to host my main style blog because you can have viral posts that get reblogged forty million times. The two main reasons I don't use Tumblr for my main style blog are because I am too tempted to reblog every cute thing I see (which gets messy and detracts from my original blog content) and because no one reads long text posts on their dashboard (or clicks on "Read More...") and I have a lot to say. Don't get me wrong, I have Tumblr and I LOVE Tumblr. I just don't think it's right for my style blog. I use my Tumblr as an inspiration blog where I reblog things that are cute, fashion that inspires me, things that get me excited, and where I answer questions from fans and readers. My Tumblr is a whirlwind of kawaii pastels. 


Find Your Niche and Stay on Topic:
Pick what you want your blog to be about and stick to it. You definitely don't want to have a blog that is alllllllll over the place. You want your readers to know what kind of content to expect when they come to your blog. You should really be able to describe your blog in one neat sentence. My blog is a Japanese-influenced fashion and beauty blog. You don't want it to be like... "my blog is about my life and school and fashion and makeup. Oh, and sometimes my pet."

The more of a specialized blog you have, the more people are likely to find your blog. Think about the number of fashion blogs there are out there. Then think about the number of j-fashion blogs. Obviously, the number of blogs specific to j-fashion are far fewer than blogs that cover every fashion trend that's ever happened, so you have a way smaller pool to compete with in search engines.


LINK, LINK, LINK
Make sure you link everything! Link your favorite places to shop. Link websites you think your readers would like. Link other beauty/fashion bloggers. Most importantly, link YOUR OWN social media sites ALL THE TIME. You want to cross your platforms as much as possible so that people know other ways to find you and connect with you. This could be a Facebook fan pageTwitterInstagram, or any other site you may want to link. People are very lazy and won't go to websites if they have to do anything more than click, so do everyone a favor and create links!!


SEO: Keywords, Titles, and Labeling
I am far from being a Search Engine Optimization (SEO) expert, but I do know that how you word your posts is very important. I'm not going to talk about this much because again, I'm not an expert, and it probably wouldn't kill you to do a little bit of your own research.
The titles of your entries should be something that may pop up in a Google Search. Think keywords. You wouldn't want to put something so vague and personal like "MY DAY WITH JESSE!!!" as the title. Instead, you could put "Roller Coasters, Funnel Cakes, and Cheap Fun at Six Flags" as your entry title, and then chat about your fun day with Jesse in the post. That way when people Google "roller coasters six flags" your entry could potentially get a hit. Titles are not the only way to get the interest of search engines. Keywords, labels, and even how you word sentences in your blog are all things that search engines notice. It's a really a very complicated subject, so I am going to stop there, haha. Just keep it in mind when working on your blog.


Make a Schedule and STICK TO IT.


Get a calendar or dry erase board or even use your phone. Create a manageable posting schedule that you can handle in addition to your work and/or school load. Having a schedule helps you know what needs to be done and by when. If you have some free time, look ahead and knock out future posts. Save them as drafts and schedule their publishing date to match your schedule. This is better than posting all of your finished entries at once. Most importantly, you want to keep your blog active! If you miss a post, it's not the end of the world, but when you have followers who look forward to your blog entries, you don't want to let them down!


I want to start a beauty and/or fashion blog. Where do I start? What kind of posts should I make?
The following are types of posts that I like to do. Of course, you should run your blog however your pretty little heart desires. ☺♡ There is not a "right" way to do it.


Product Reviews Related to Blog Content
Whether you want to start a makeup or fashion blog, you can always do product reviews. People love to read about what others think of products before investing in them blindly. Start by reviewing things you already have. Review your favorite eyeliner or favorite accessories. Companies don't need to sponsor things in order for you to write a review about them. Tell us where you got this item, why you like it, etc. Include lots of pictures! People aren't likely to read huge blocks of text, so I like to break it up with photos. The photos don't need to be fancy, but they shouldn't look awful either. Smart phone photos are fine. I use an iPhone 5 for most of the photos on my blog. If your goal is to get companies to send you free stuff for you to review on your blog, you're going to need a blog that has reviews on it. No one is going to sponsor a review if you have no history of reviews in your blog.
Here is an example of (part of) a product review:


Of course, you can find full reviews by clicking the "Product Review" tab on the top of my blog. They are all pretty long. 


#OOTD / #MOTD / #FOTD
Outfit of the Day / Makeup of the Day / Face of the Day
If your blog is about style or makeup, show us how you bring your passion into your life. This shows readers what your taste in makeup/fashion is like and also displays your talents. It makes you more personable and relatable and helps readers feel connected to know there is someone behind the blog. Certainly, this is not something that you need to do EVERY day. I mean, some days I don't even get dressed. So, that is an example of a day I would definitely NOT do a #ootd :p hehehe. Again, pro photos not needed. Here is an example of my OOTDs aka Daily Style Posts, where all the photos are taken with my cell phone:


Tutorials
If you learn something cool, share it! A lot of people read blogs and watch YouTube to learn new tricks and tips. If you are a makeup junkie, show us how it's done! Put yourself out there on YouTube. If fashion is your thing, show us how to style or sew or anything! If people are on your blog, they obviously think you have something to offer.
Here is an example of a makeup tutorial I have on YouTube:


♡♡♡♡♡


The main thing you should know about being a blogger is knowing that it takes a lot of work. It takes a lot of time to take photos and thoughtfully create entries that people want to see and read. It is also very rewarding and it's really fun to go back in time and to see how far you've come. I put a ton of heart into my blog and it can be truly exhausting at times. But I am, and always will be, hugely dedicated to my fans. I will continue to blog and hook you guys up with style tips for as long as I can possibly do so, because it is something that I love very much.

Thanks for taking the time to read this long post. I hope you have found some of this information helpful and will be able to use some of it on your own blog. If you have a blog, leave the link in the comments below! I would love to look at them!!! :3

xoxoxoxo

Thursday, April 24, 2014

My Neighbor Totoro Inspired Makeup Tutorial

Do you love My Neighbor Totoro as much as I do??
 As you could probably tell by my Totoro Daily Style post, I looooove the fluffy little guy. 


So, I made a Makeup Toturial (get it?? Totoro... tutorial.... yeah???) for my Totoro-inspired look.

Check it out!:

Wednesday, April 16, 2014

#WigWednesday Wig Care Tutorial: How to Make Tight Curls into Voluminous Loose Curls

It's Wednesday!! You know what that means... This week's edition of... drum roll please....
WIG WEDNESDAY!!!
If you've missed the previous #WigWednesday Tutorials, you can check them out here:

How to Brush a Wig
How to Brush and Restore Straight Wigs
How to Brush and Restore Curly Wigs
How to Store Wigs

& this week I bring you...

How to Make Tight Curls into Voluminous Loose Curls

This may be the most terrifying restyling method that I've tried, but it easy, effective, and very fast. Much to my surprise, the results were exactly what I had hoped for. I probably would have never tried it if I just read about it somewhere on the internet (like this blog haha), but it was recommended and demoed to me personally by the designer of Gothic Lolita Wigs and RockStar Wigs himself, Charles Reger.

Take a wig with super tight curls, like the Sweetheart Collection from Gothic Lolita Wigs.


Here it is straight out of the bag. So perfect and beautiful! 


♡♡♡♡♡♡


After I shot the Sweetheart in Auburn for the Gothic Lolita Wigs site, I wanted to poooooooof it out! So, here is how you do it.


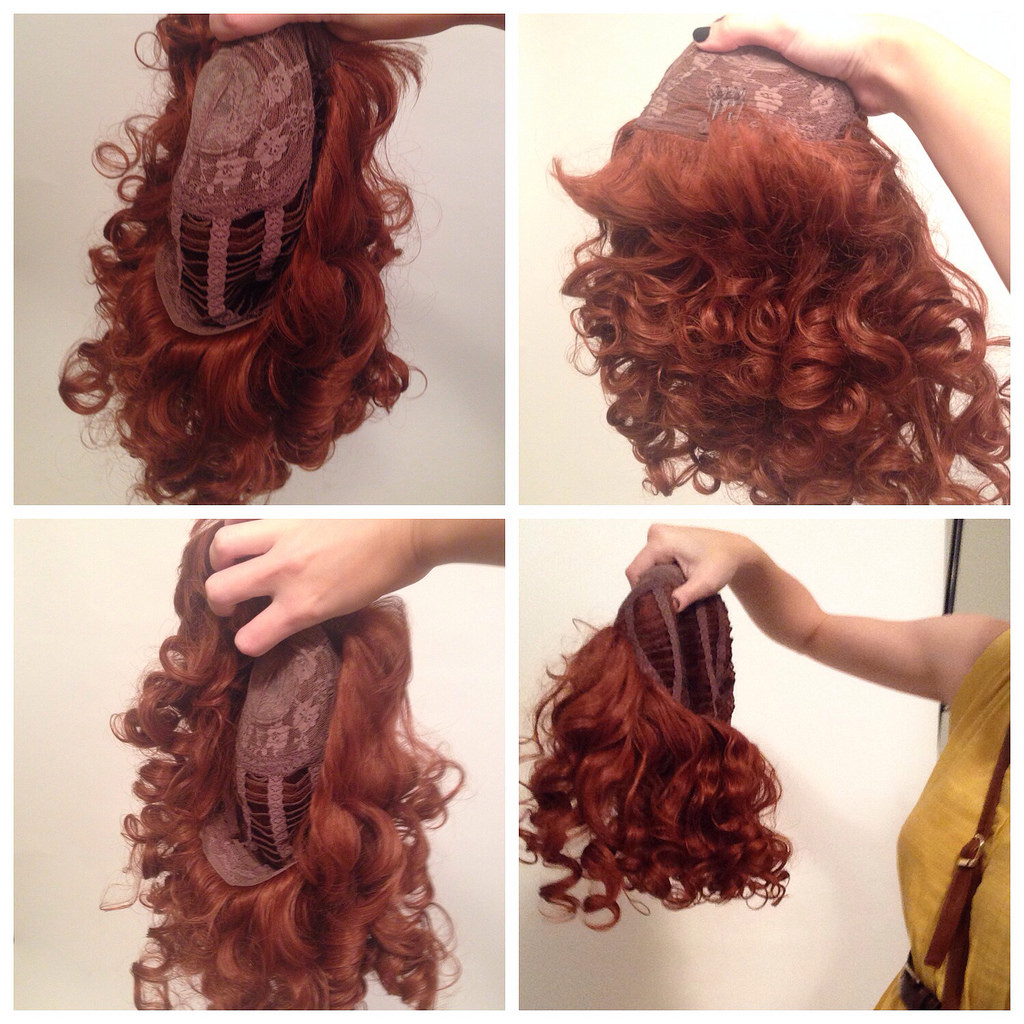
Flip the wig inside out. Violently shake the wig around. Sling it up and down. Pretty much do everything you feel like you should never do to your beloved wig. Get crazy.


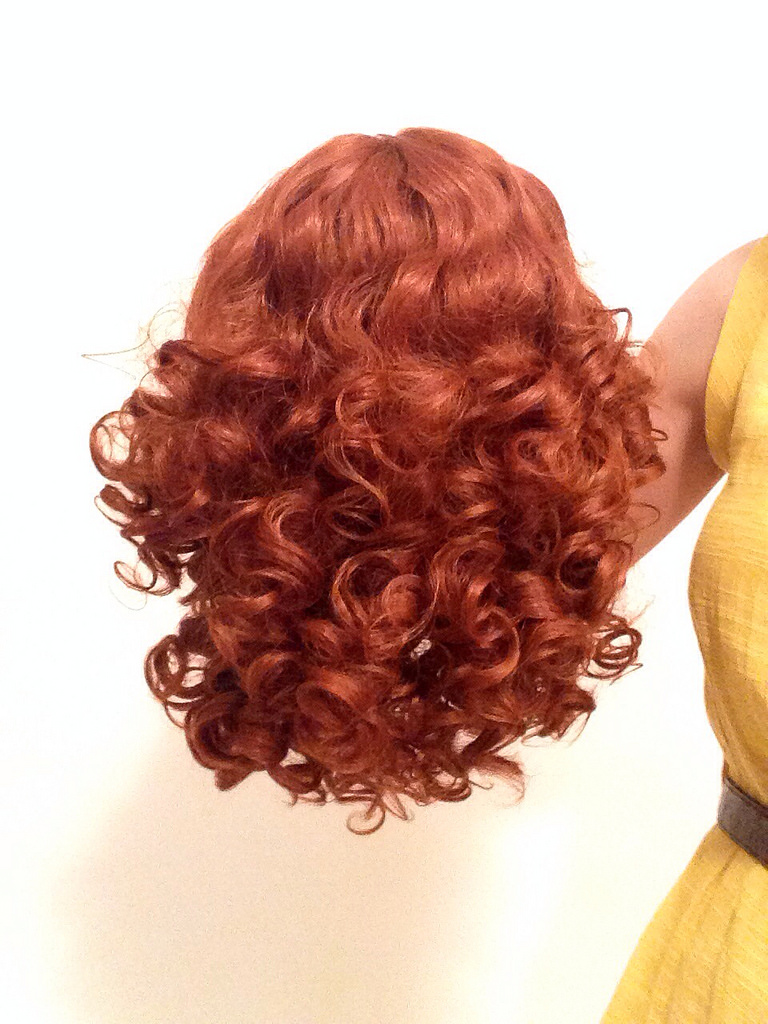
When you flip it back the right direction, you have looser curls and way more volume!
Just smooth out any curls that need your attention, you're good to go!


You can do this with pretty much any style! If you want the Rhapsody to be fluffier like the Prima Donna, flip it inside out and shake it all around!

What do you think? Will you try this daring method??
Until next week...
xoxox


Friday, April 11, 2014

Wednesday, March 19, 2014

#WigWednesday Wig Care Tutorial: How to Store Wigs

Hi everyone! It's that time again... #WigWednesday!! This Wednesday we are going to discuss how to store your wigs! If you have missed the previous posts in this series, you can check them out there:


So let's get to it!

How to Store Wigs

People always ask me, 
"You have so many wigs. How do you store them all???" 
Well, whether you have a lot or a little, you store them the same way! The best way to store wigs is in the package they come in. Once you have them back in their bag, you can store them just about anywhere, as long as it's a dry place with a reasonable room temperature. 
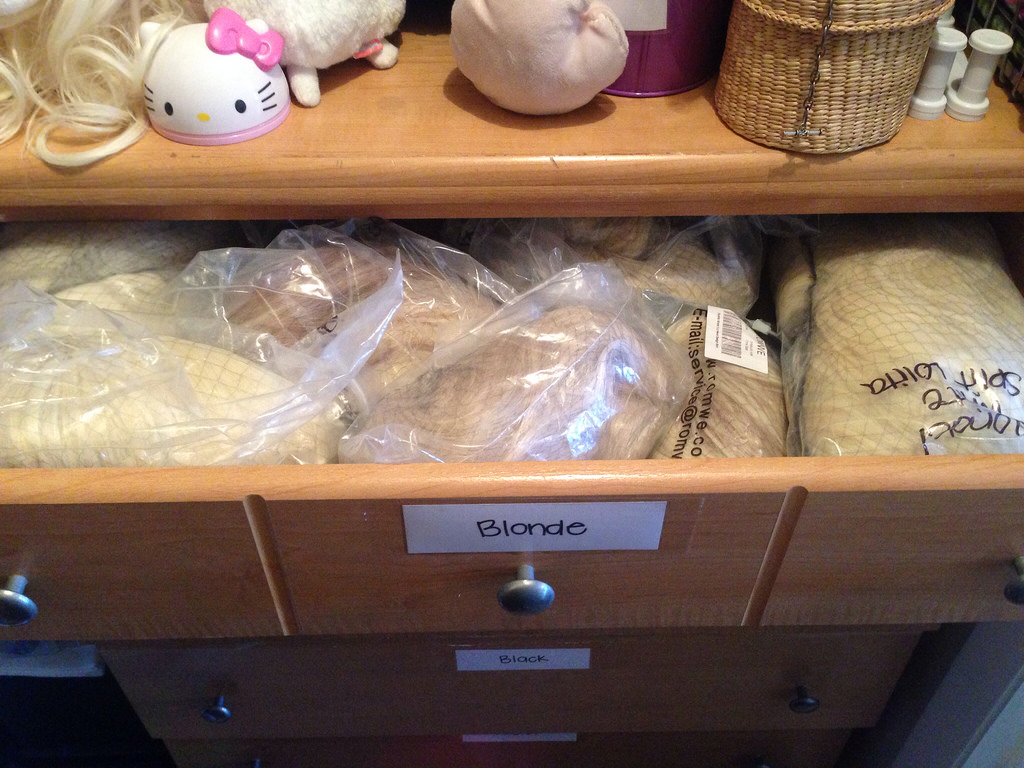
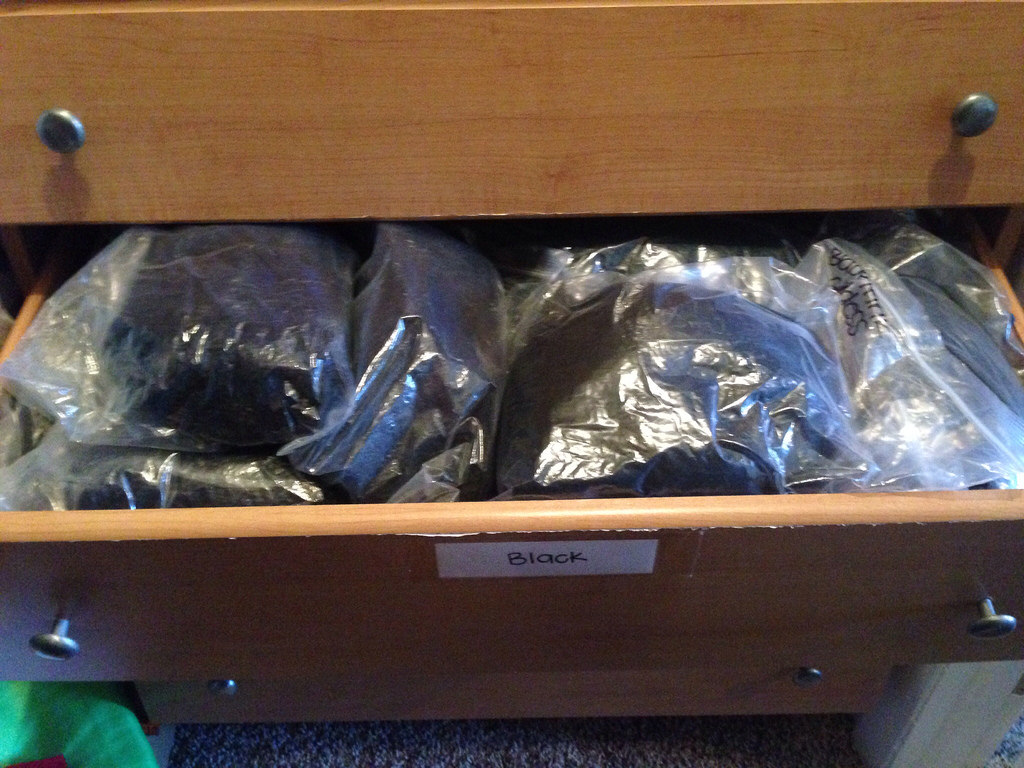
Most people I know store them in drawers or baskets. I just have so many that I have a whole dresser dedicated to living the wig life. XD


So, wigs are wild and crazy. How do you get them back in the package they came in?

Wigs come with a hair net and a bag. Sometimes they come with tissue paper and a cardboard lining. For the sake of this guide, we are going to pretend your wig came with all of these things. If your wig didn't, just skip that step. ;D


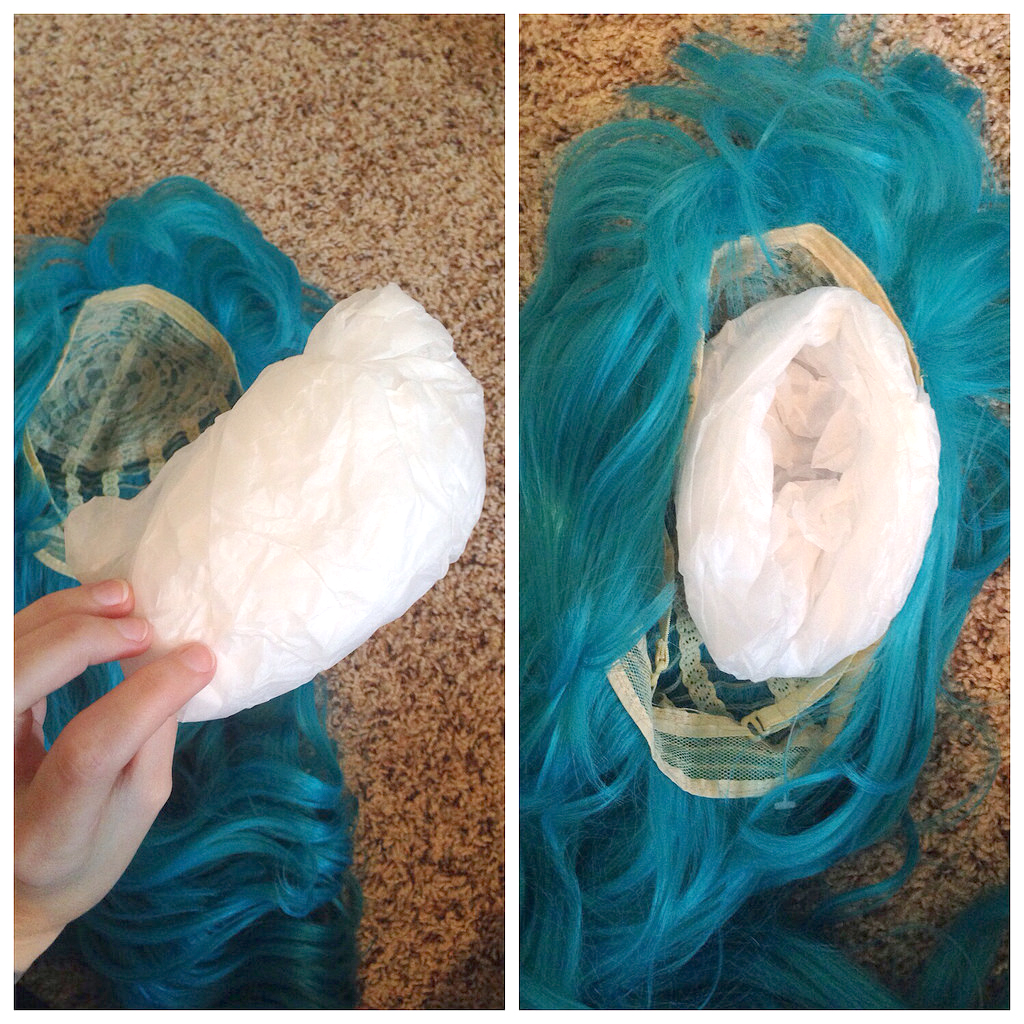
Start by putting the ball of tissue paper into the wig cap. The idea is that it helps keep the base rounded out (like a head) so that it doesn't lay completely flat & look totally whack when you put it on again later. To be honest, I hardly ever use the tissue paper when packing my wigs and I have never had an issue with them not fitting my head when I pull them out of the bag later. So, if your wig didn't come with a ball of tissue paper, I really wouldn't sweat it. But in the spirit of a thorough tutorial, I am going to pack it with the tissue paper anyway. (OvO)


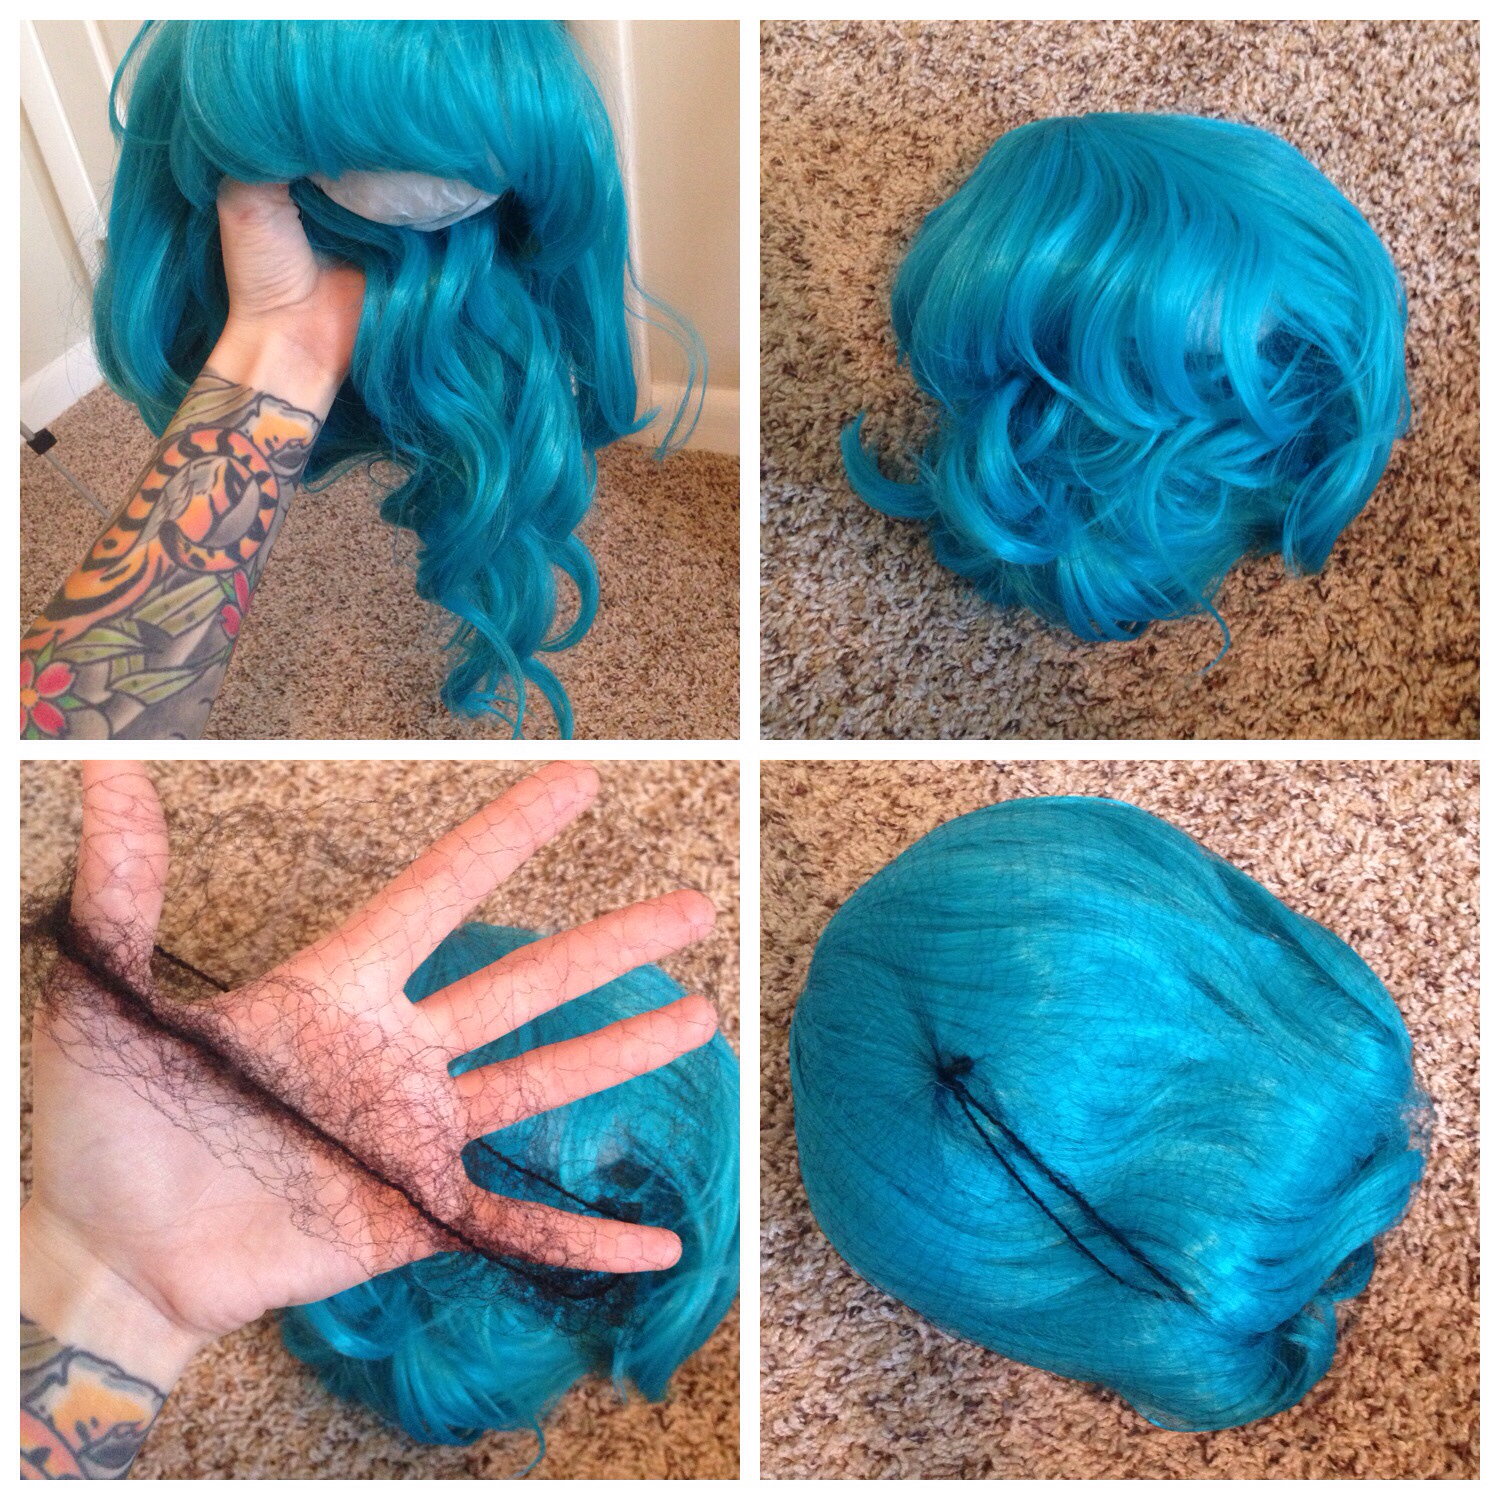
Then you want to wrap your wig back up in a wig net. This will help keep your wig contained and help it keep its style. If you just shove it back into it's bag without a net, you'll increase the risk of frizziness and total chaos when you pull it back out later. Sometimes you can get away with not using a net on short bobs or boy style wigs. I'm convinced that little wig fairies come in and steal wig nets, so if you are short a few nets, use them on your longer curlier wigs instead of short boy style. Got it?

There are lots of different ways to get them back in the net, but I usually just like to gather the longest parts of the wig and carefully tuck them up into the cap. Some people do it other ways, but I find it easier to put the net on if all the curls, longer pieces, etc., are contained inside the base of the wig. 

Once your wig is tucked into a cute little ball, just stretch the net over the wig. Simple as that!


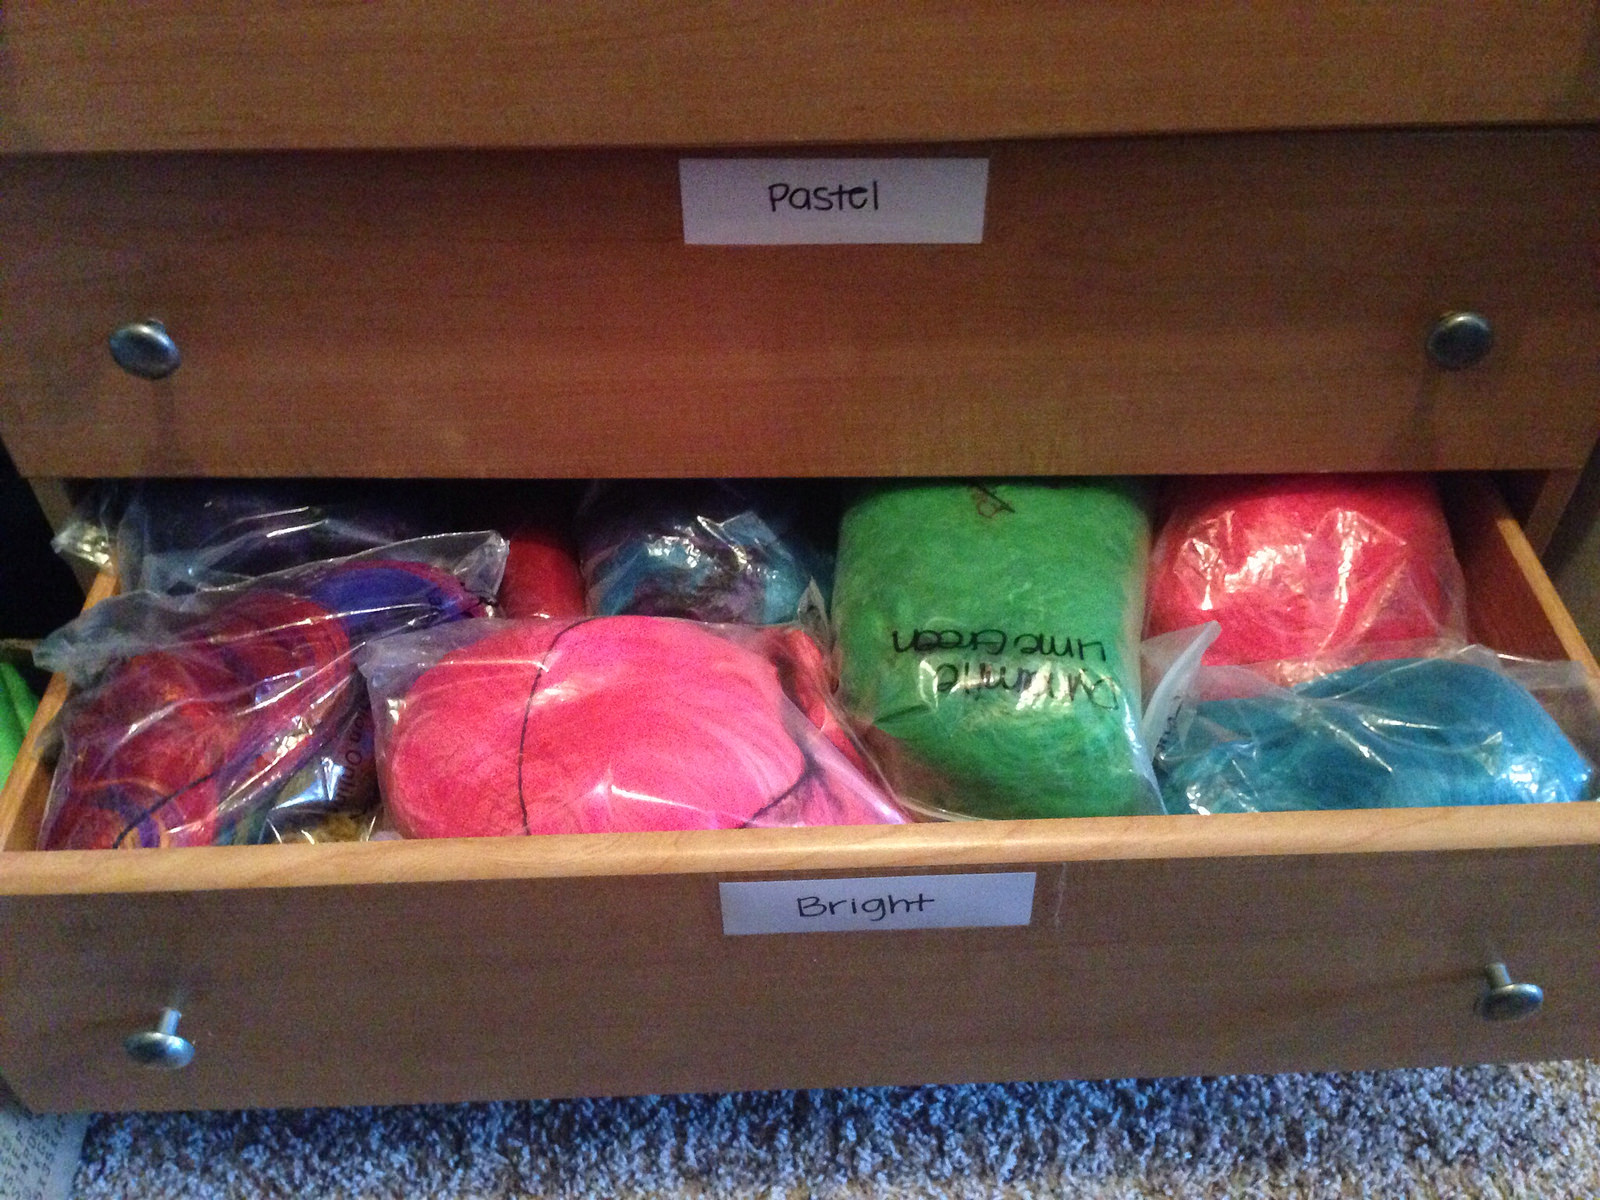
Next, it's time to pack it up! I always label my bags so that I can keep my wigs organized. This is the Gothic Lolita Wigs NeoClassic in Turquoise.

This step is pretty self explanatory in the graphic above, but in case you can't see it for whatever reason, I'll explain.
Take your netted wig and put it inside the cardboard. Put the cardboard in the bag.
I guess that wasn't much of an explanation XD

So, that's it!!! Then I put the wig back into its corresponding drawer. In the case of the NeoClassic Turquoise, its home is the "Bright" drawer.


Now that I've teased you with a glimpse into the "Bright" drawer, I know you're curious about all of the other drawers.

Blonde:

Brown/Burgundy:

Black:

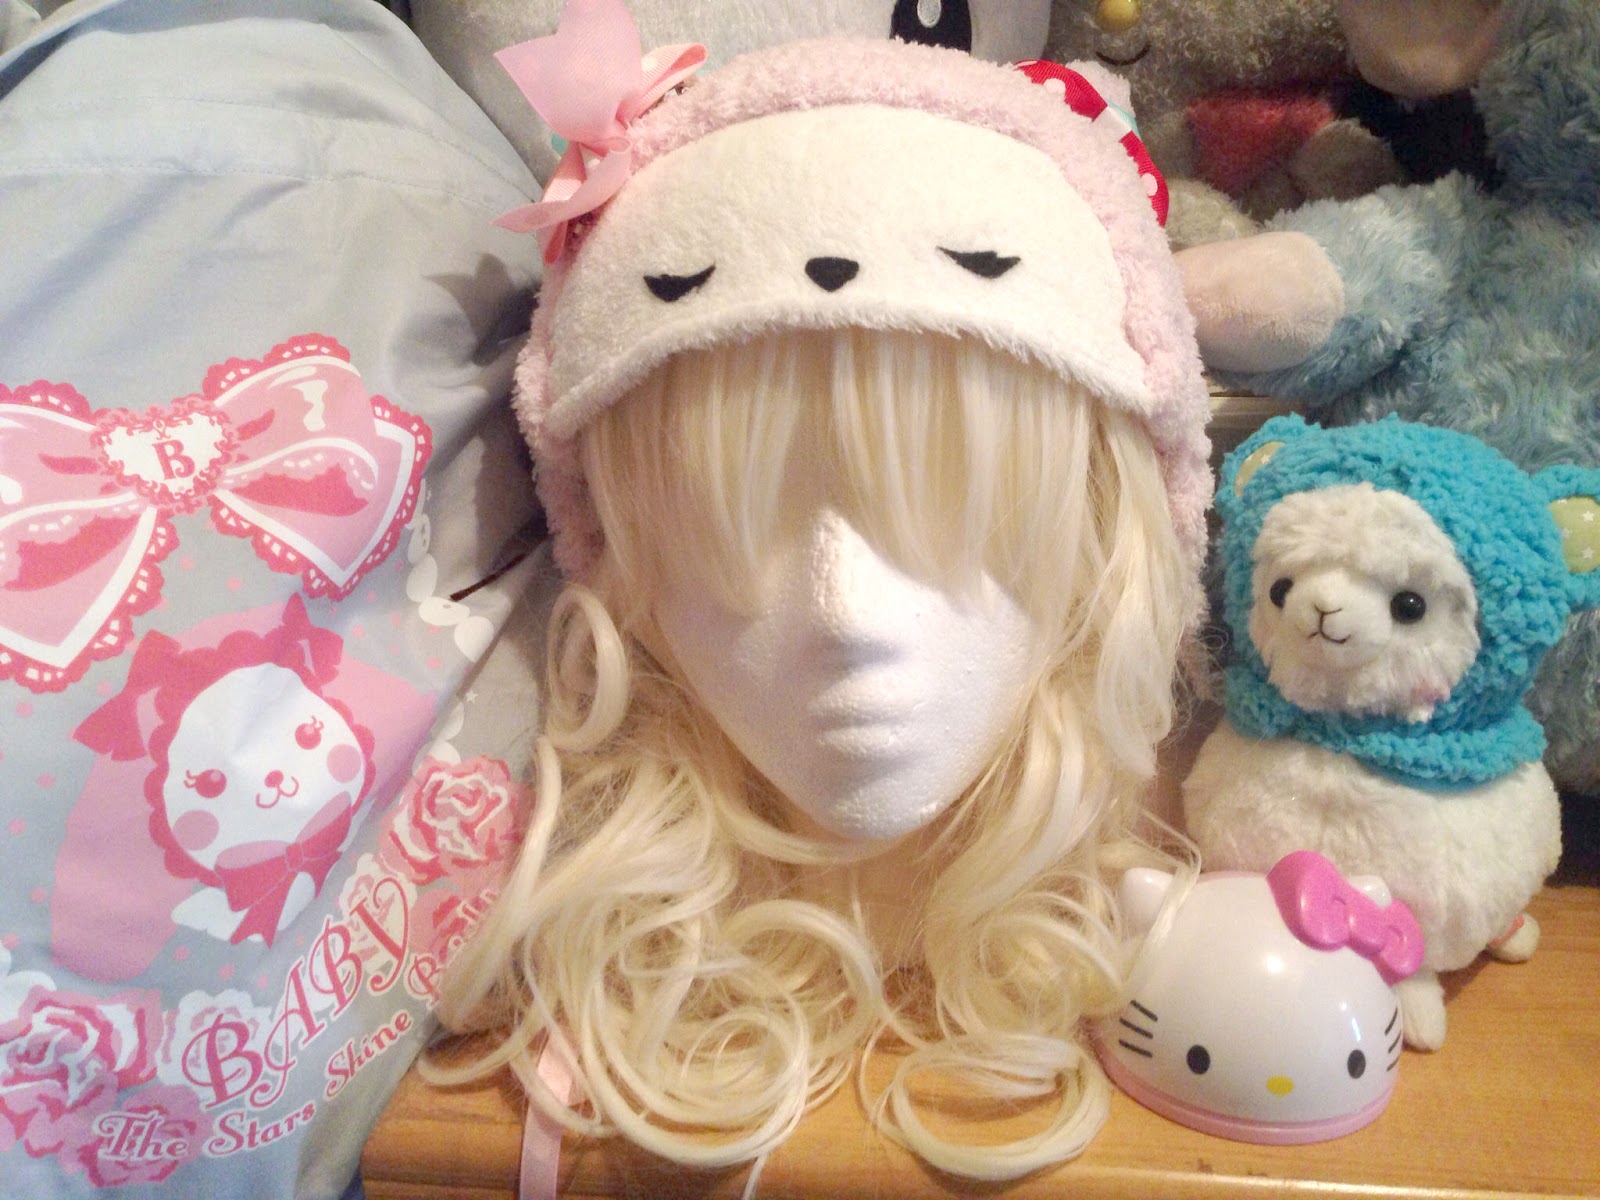
Pastel:

Bright:

Hahahah, okay. I know. I'm ridiculous and excessive.

Oh, and I definitely want to touch on this reallllllly quick.
I know a TON of you LOVE to display your wigs as storage. And why wouldn't you?? They are beautiful!


This is a fine way to store them, but there are two main things to beware of when doing this, especially if you don't wear them very often~
1. If your wig is sitting out on display, it is likely that it will collect dust while sitting out. Who wants dusty hair? Storing it in its bag will keep dust out of it.
2. IF YOUR WIG IS CURLY: If you keep your curly wig out on display, keep in mind that gravity is a thing. When there is a constant pull of gravity on the curls, they will start to lose their shape over time. Think about it. It makes sense. Straight wigs are a better choice for display wigs ;D


&&&&&&&&&&&&&&&&
That's it!!!!

I hope you learned something from today's #WigWednesday Wig Care Tutorial! Check back next week for
How to Restyle Tight Curls into Voluminous Loose Curls

xoxoxo


Friday, March 7, 2014

Thursday, March 6, 2014

How To Be A Model - Beginning Modeling Guide & How I Became a GLW Muse by Alexa Poletti

Hi hi hi!! Today I have a very special post for you. This topic is a little outside of my usual fashion posts, but it is a topic that I get asked about soooo often that I felt like it deserved it's own post. I am excited about it, so I hope that you are excited to read it!

Drum roll pleaseeeeee....


Now, of course, I am not a modeling agent or anything like that, but I have just put together a personal guide of tips and whatnot that I have learned over the last few years of being a model. And of course, this isn't the only way to be a model! There are many, many other ways to go about it! Everyone wants to know how to start modeling. People literally ask me this more than ANYTHING ever. So let's get started! 

FIRST THINGS FIRST.

I know this seems like a given, but SKIN CARE. 
I can not stress this enough! Please, people! Take care of your skin! Wash your face & moisturize (if your skin needs it) every day. Washing is important for obvious reasons. Moisturizing will help skin keep its elasticity which helps reduce wrinkles and promotes healthy skin. If you have to go out in the sun, or are someone who likes to tan, protect your skin with sunscreen. I literally keep sunscreen in my purse and in my car. I hate being tan! *hiss*!!
 I know many of you reading this blog are teenagers, so what I want to stress to you is DO NOT SLEEP IN YOUR MAKEUP. I was sooo guilty of this when I was a teenager. Whenever you want to just fall into bed and sleep and the thought of taking off your makeup makes you want to die, at the very least, take off your makeup with a makeup remover wipe or something. Sleeping in your makeup at night will rapidly increase how fast your skin ages. Annoying right? We just can't win. But as a teenager, I know you don't care about wrinkles. But you will care one day, and especially if you want to be a model, think twice before sleeping in your makeup. Sleeping in your makeup also increases your chances of breakouts. Find a skin care routine that works for you. Everyone gets a pimple from time to time, but if you show up to a photoshoot or fashion show with acne spread all over your lovely face, you are definitely not going to have a happy photographer/client.

Learn Your Angles
Pretend your mirror is a camera and move your head around in every direction and angle that you can think of. Faces look different every way you turn them. What is your most flattering way? Try to angle your head to accentuate your great features and downplay features you don't like. For example... If you have a square jaw, you may want to tilt your head down. If you have a long nose, you may want to look straight on. If you have a round face, you may want to turn your head slightly one way or the other. 
But let's get real. I know you've got your selfie game on lock. You probably already know your angles.

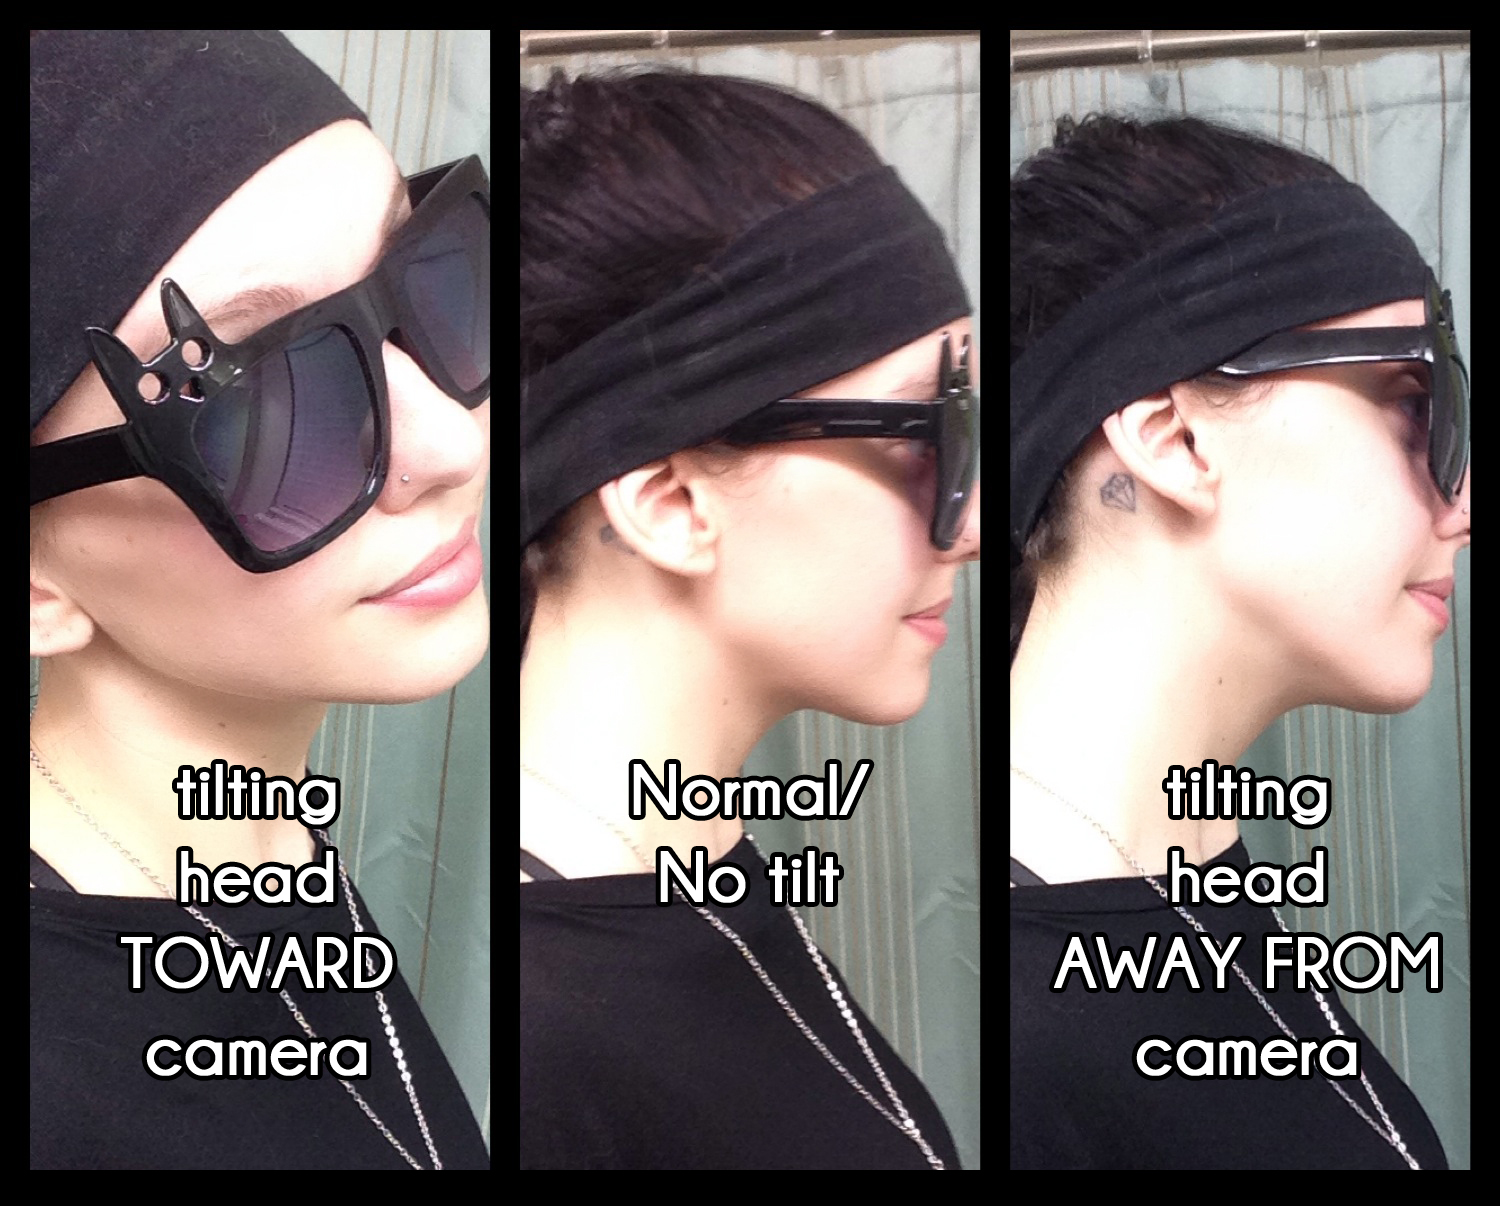
*TIP*  My favorite tip for pictures where you aren't directly facing the camera: Tilt your head towards the camera, to create a sharper jaw line. When you tilt your head away from the camera, you quickly lose definition in your chin. 

cat glasses because why not?


Learn How To Pose
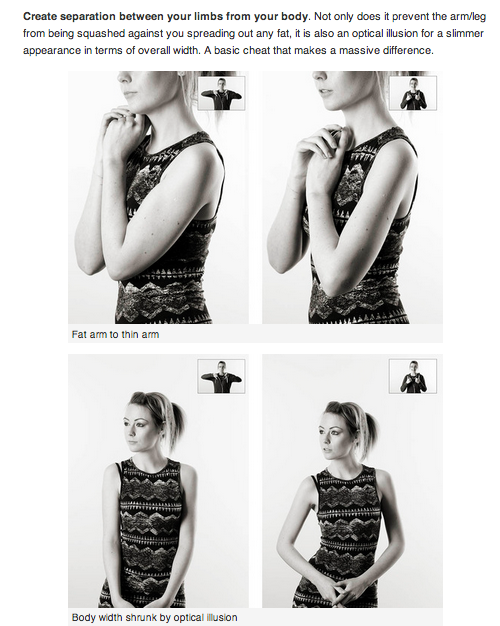
Do some homework. Research models that you like, styles you like, photographers you like, and fashion you like. Take note of how the models are posed in these pictures that you find appealing. Try to keep some of those poses in mind while you practice poses in the mirror. You'll learn pretty quickly what looks bad. The body part that I find (as a photographer) to be the most often neglected are the hands. Keep your hands pretty! Pretend you're a dancer and you want soft little delicate princess hands. Unless you're a grunge goth model, but even then, you don't want to look like you have robot hands. It is easy to forget because you are busy concentrating on posing your face, your hips, legs, arms, etc. You can have the best pose everrrr and it will still look uncomfortable and unnatural just by forgetting to pose your hands. Once you've found a few poses that you think are solid, get your sister or best friend or brother or dog to take some practice photos of you on their phone just so you can see how your poses translate when seen from another person's perspective/camera. It's helpful to check it out on an iPhone screen before you even bother jumping in front of a real camera.

*TIP* Check out this great article for tons of tips on posing:

Screenshot from PetaPixel's article on posing. Read the article HERE.


Once you feel like you're ready with your posing and angles... 

Hire an amazing photographer to start your portfolio.
If you're serious about being a model, bite the bullet, save up, and pay for a good photographer. No amazing photographer is going to want to shoot a new model for free and no one is going to want to shoot a model with a shitty portfolio period. It's as simple as that. Find a photographer in your area that you love (Google is your best friend) and hire them. Great photographers make YOU look good and a lot of them will help direct your posing, which is super helpful to newbies. Once you have a solid start to your portfolio, more photographers will be willing to work with you for cheaper rates or even just TF (trade for... time, prints, etc. = free).  It all starts with those initial great shots for your port.

Build your portfolio the right way.
Only include your best photos. QUALITY OVER QUANTITY. If your photographer gives you 10 photos from that look similar with slight pose changes, CHOOSE ONE. We don't need to see an album on Facebook with 45 pictures from the same shoot. Narrow them down to only your best shots where the posing, expression, setting and/or framing are noticeably different from one another. Once you have a ton of shoots under your belt, start only using your best shoots in your port. Portfolios are constantly evolving, so don't be afraid to give older shoots the boot. You want your portfolio to be something you're proud of. 

-BE MINDFUL OF COPYRIGHT AND NEVER EVER CROP OUT LOGOS (unless you state somewhere else ON THE PHOTO, not description). It is illegal to sell your pictures even if they are of you. Copyright belongs to the photographer unless you have a contractual agreement saying you are allowed to use the photo for profit. It's a small industry. Photographers are friends with photographers. If you treat one photographer poorly, word will get around and no one will want to work with you anymore.

Once you have a great port...

-One thing you could do is get an agent.
But I don't have an agent so I am not going to talk about that because I have zero knowledge on the subject. So instead...

Start reaching out! Start a fan page. Start an Instagram account. Find a way to get your modeling photos online. Think of companies you like or admire and see if they are looking for models. Enter contests. Send companies pics of you wearing their clothes... They love that! Try to get featured on their social media pages & maybe they will just be blown away by your awesomeness. Show them your portfolio and show them that you have something to offer. If your portfolio is strong enough, they won't feel as nervous about taking a risk on you. Try contacting small businesses or etsy sellers about modeling their items. Get your face out there. But also be mindful that once you are trying to make yourself a public figure, you have to always portray yourself the way you want people to see you on social media and in life in general.

-Prepare for disappointment. Expect to be let down. When it comes to modeling, you hear no a lot more often than you hear yes. Plus, when you put yourself out there, people are going to hate on you because they have nothing better going on in their lives. They are going to call you names, insult you, and beat you down. To them, you'll always be too fat, too skinny, too ugly, too tall, too stupid. Expect your figure, your race, your expressions, and even something as stupid as styling choices that didn't even have anything to do with you to be attacked, and to somehow make you a "terrible" model. You'll never win if you try to make everyone happy. Just make yourself happy! Grow a tough skin and brush off the negativity. Don't let words hurt you or you'll never make it. Haters and trolls don't go away, unfortunately. 

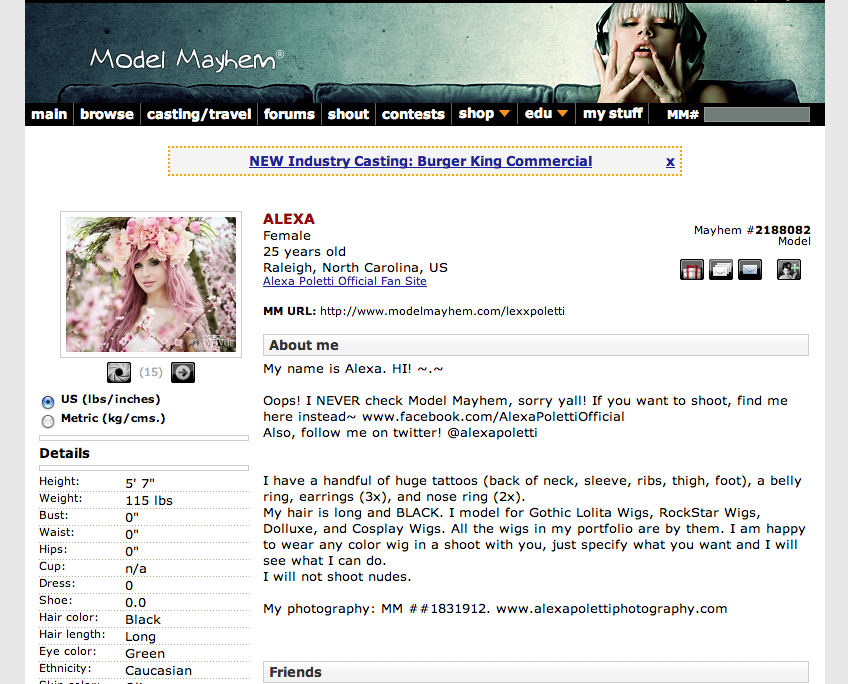
-& I debated including this, but I constantly get asked about Model Mayhem for newbie models, so I will address it.


This site is SKETCHY so if you choose to use it, be careful. Do not try to shoot with every photographer who contacts you. Take a VERY CLOSE look at their portfolios and shoot only with those who would benefit you the most. Do your research on the photographer before you shoot with them. Do they have a website that is legit? Do they have a business page on Facebook? Basically, find their internet footprint and see what you can find out about them before you agree to go meet a stranger and stand in front of their sketchy camera. You wouldn't go model for someone on Craigslist without doing any research about the potential serial killer photographer, so be smart about it. Bring a friend with you if it's your first time shooting with a new Model Mayhem photographer. Your safety is worth bribing your friend to come with you and sit around for two hours playing Flappy Bird.
Also, prepare to get bailed on. Model Mayhem users are notorious for bailing last minute. It's annoying.
But every now and then, Model Mayhem can come through for you, which leads me right into...


So all in all, I think if it weren't for Model Mayhem, I wouldn't be where I am today. Just PLEASE be smart about meeting people from the internet. 

Sincerely,
A Person from the Internet 


Good luck with your modeling endeavors! I hope you find this guide helpful!

Wednesday, March 5, 2014

#WigWednesday Wig Care Tutorial: How to Brush and Restore Curly Wigs

Happy #WigWednesday!! Are you ready for Week 3 of #WigWednesday Wig Care Tutorials? In case you've missed the previous two weeks, you can read them here:
How to Brush a Wig
How to Brush and Restore Straight Wigs

& now, on to Week 3:

How to Brush and Restore Curly Wigs

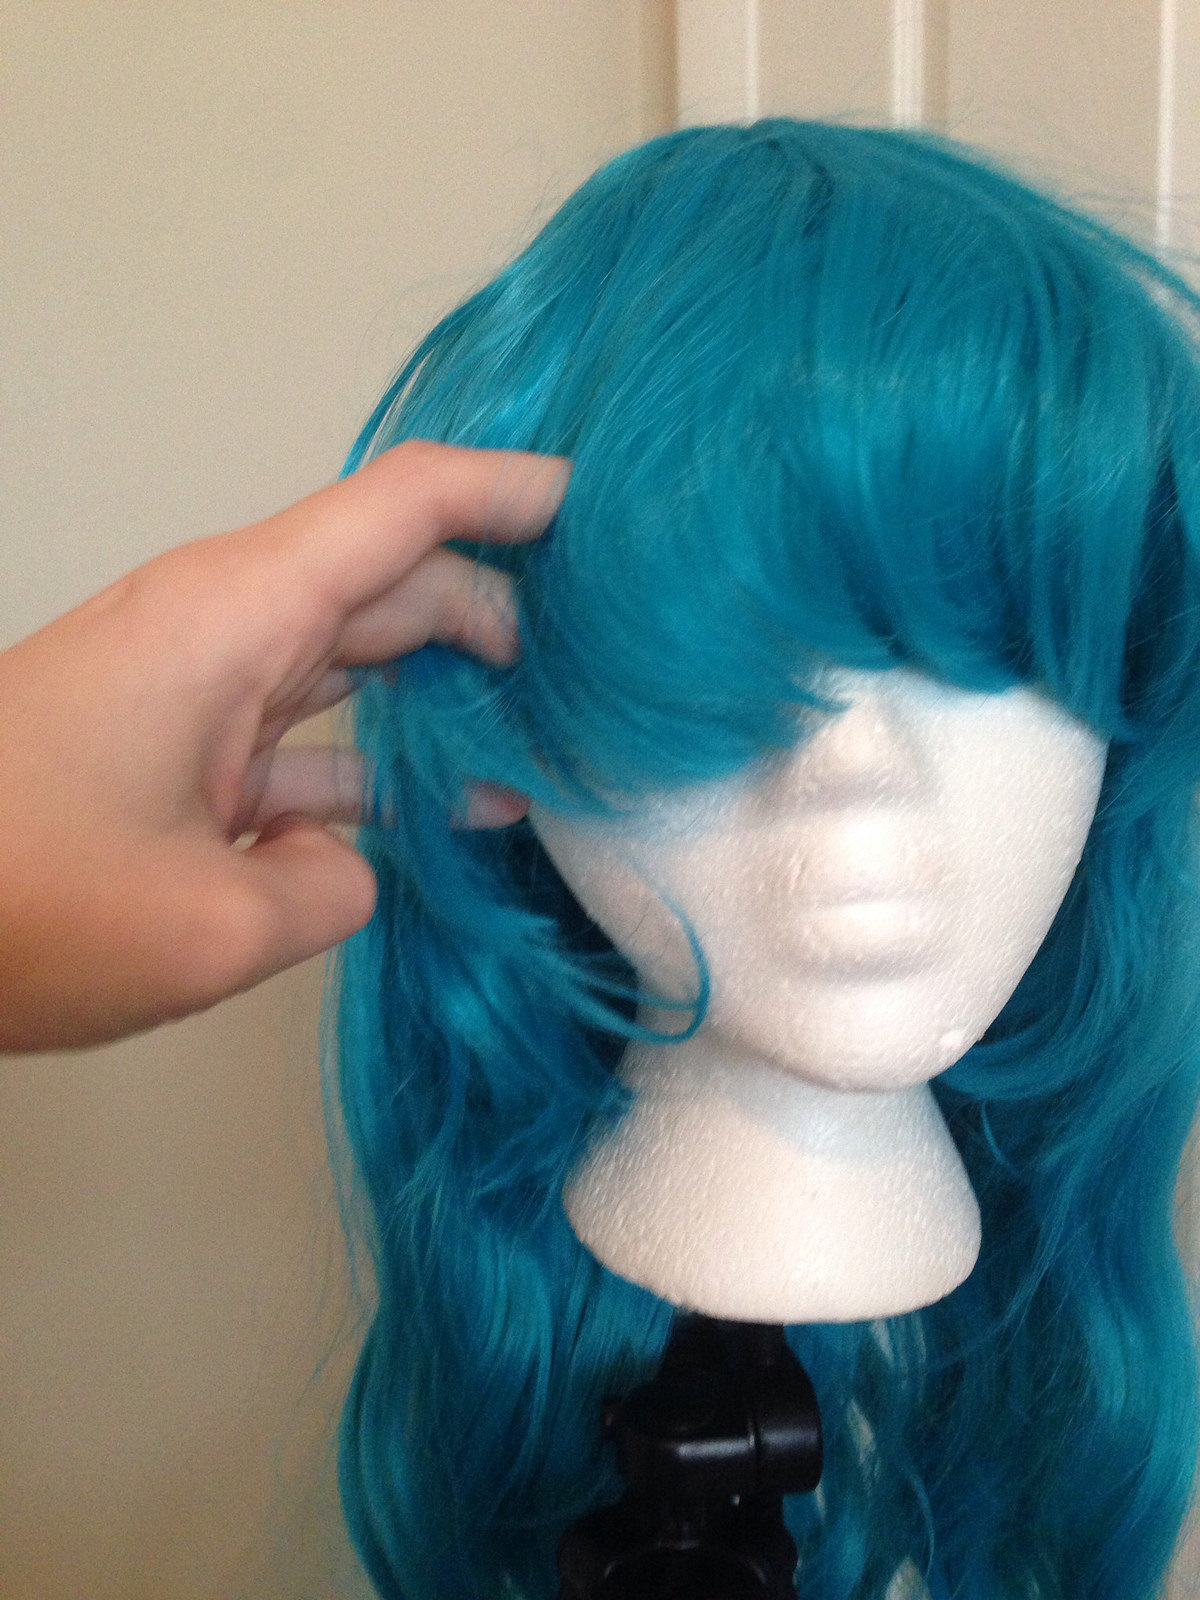
Curly wigs can be a little more difficult to maintain than straight wigs. My preferred method for brushing curly wigs is finger-combing. Finger-combing just means using your fingers to brush through hair. It is a much more gentle way to handle hair and can extend the life of curls. You may still need to use a comb in areas that are badly tangled.


When finger-combing curls, the best way to do it is to section off the curls. You want to handle each curl individually, so again, patience is key! As you run your fingers through the curls, you want to go in the direction of the curl. This means spinning your hand as you work down the curl. After the curl is detangled, you may need to reshape the curl a little bit. 


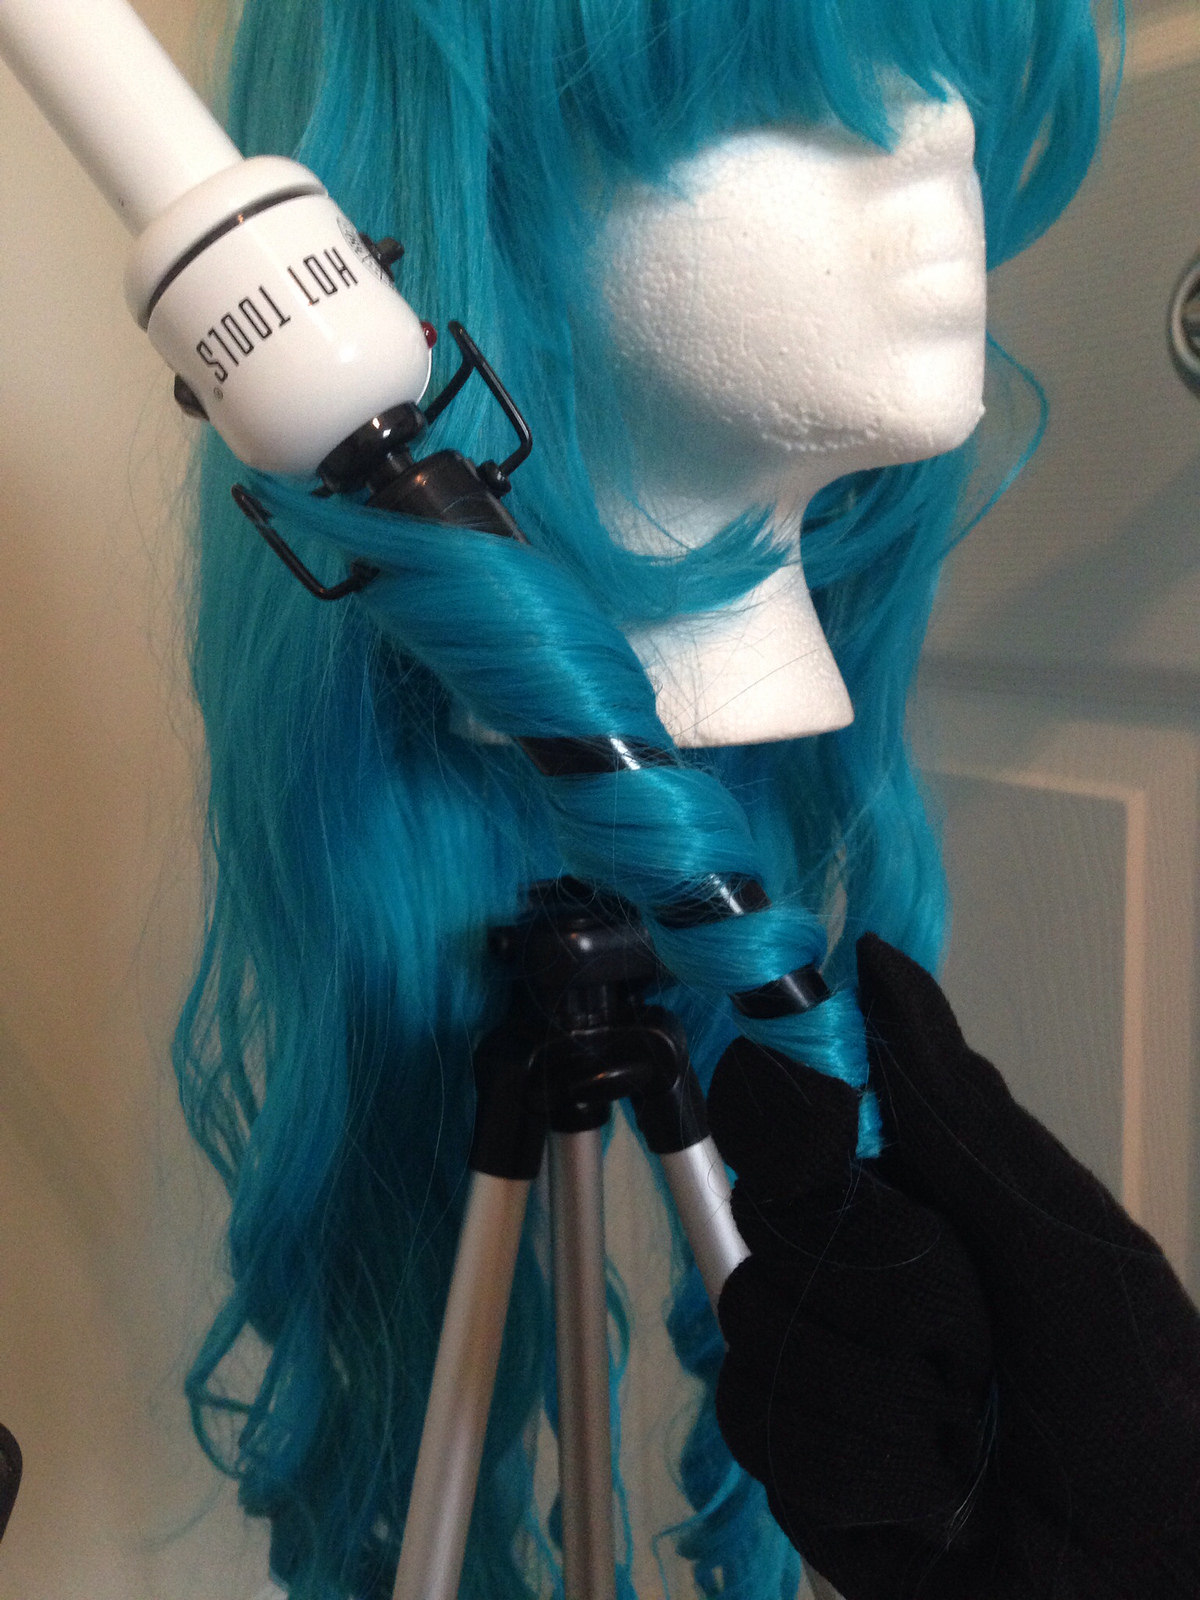
There are a few ways to reshape curls. The quickest and easiest way is to wrap the curl around your finger and hold. I think you will be surprised how much this helps the curl bounce back. If that's not enough to restore your curls, apply heat. Again, like with straightening, you should check the max temp your wig can handle.


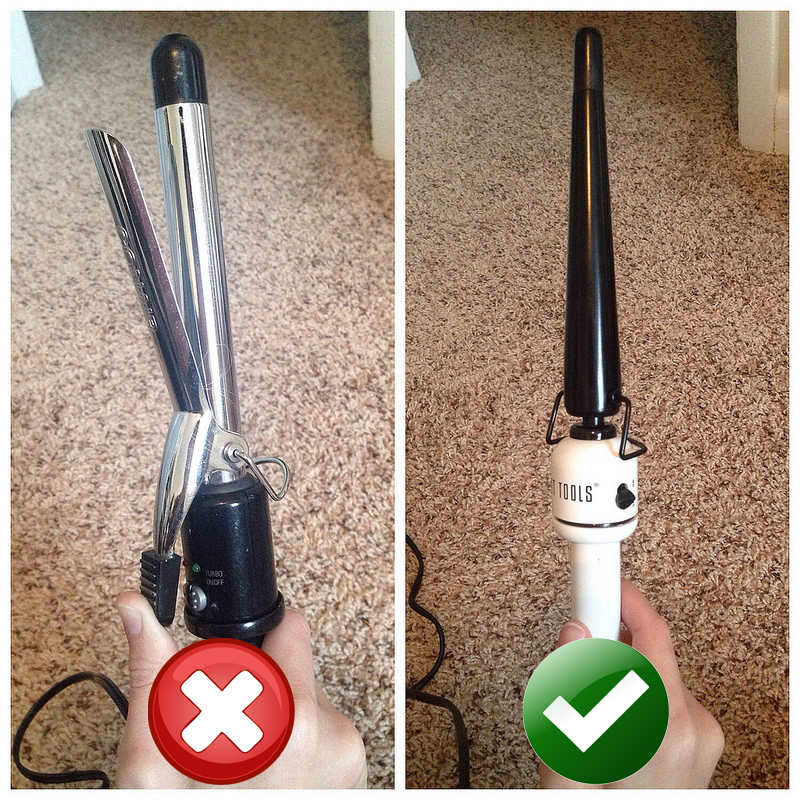
 A curling wand (no clamp) is ideal for curling wigs. If you don't have one, just be sure not to use the clamp of your styling tool. The clamp will make creases & could burn the hair, eww! Wrap the curl around the curling iron the same way you did your finger, hold for just a few seconds, then gently slide the curl off. 


If your wig has tight curls (ex. GLW Ringlet Redux), you should wrap the hair tighter. If it has loose curls (ex. GLW Duchess Elodie), then wrap the hair loosely. Simple as that!

There is no guarantee that you can restore curls exactly to their original state, but I hope these tips help!

Good luck!

Check back next Wednesday for:
How to Store Wigs

♡♡♡♡♡♡♡♡♡♡♡♡♡♡♡♡♡♡♡