Showing posts with label Wig Care. Show all posts

Wednesday, April 16, 2014

#WigWednesday Wig Care Tutorial: How to Make Tight Curls into Voluminous Loose Curls

It's Wednesday!! You know what that means... This week's edition of... drum roll please....
WIG WEDNESDAY!!!
If you've missed the previous #WigWednesday Tutorials, you can check them out here:

How to Brush a Wig
How to Brush and Restore Straight Wigs
How to Brush and Restore Curly Wigs
How to Store Wigs

& this week I bring you...

How to Make Tight Curls into Voluminous Loose Curls

This may be the most terrifying restyling method that I've tried, but it easy, effective, and very fast. Much to my surprise, the results were exactly what I had hoped for. I probably would have never tried it if I just read about it somewhere on the internet (like this blog haha), but it was recommended and demoed to me personally by the designer of Gothic Lolita Wigs and RockStar Wigs himself, Charles Reger.

Take a wig with super tight curls, like the Sweetheart Collection from Gothic Lolita Wigs.


Here it is straight out of the bag. So perfect and beautiful! 


♡♡♡♡♡♡


After I shot the Sweetheart in Auburn for the Gothic Lolita Wigs site, I wanted to poooooooof it out! So, here is how you do it.


Flip the wig inside out. Violently shake the wig around. Sling it up and down. Pretty much do everything you feel like you should never do to your beloved wig. Get crazy.


When you flip it back the right direction, you have looser curls and way more volume!
Just smooth out any curls that need your attention, you're good to go!


You can do this with pretty much any style! If you want the Rhapsody to be fluffier like the Prima Donna, flip it inside out and shake it all around!

What do you think? Will you try this daring method??
Until next week...
xoxox


Wednesday, March 19, 2014

#WigWednesday Wig Care Tutorial: How to Store Wigs

Hi everyone! It's that time again... #WigWednesday!! This Wednesday we are going to discuss how to store your wigs! If you have missed the previous posts in this series, you can check them out there:


So let's get to it!

How to Store Wigs

People always ask me, 
"You have so many wigs. How do you store them all???" 
Well, whether you have a lot or a little, you store them the same way! The best way to store wigs is in the package they come in. Once you have them back in their bag, you can store them just about anywhere, as long as it's a dry place with a reasonable room temperature. 
Most people I know store them in drawers or baskets. I just have so many that I have a whole dresser dedicated to living the wig life. XD


So, wigs are wild and crazy. How do you get them back in the package they came in?

Wigs come with a hair net and a bag. Sometimes they come with tissue paper and a cardboard lining. For the sake of this guide, we are going to pretend your wig came with all of these things. If your wig didn't, just skip that step. ;D


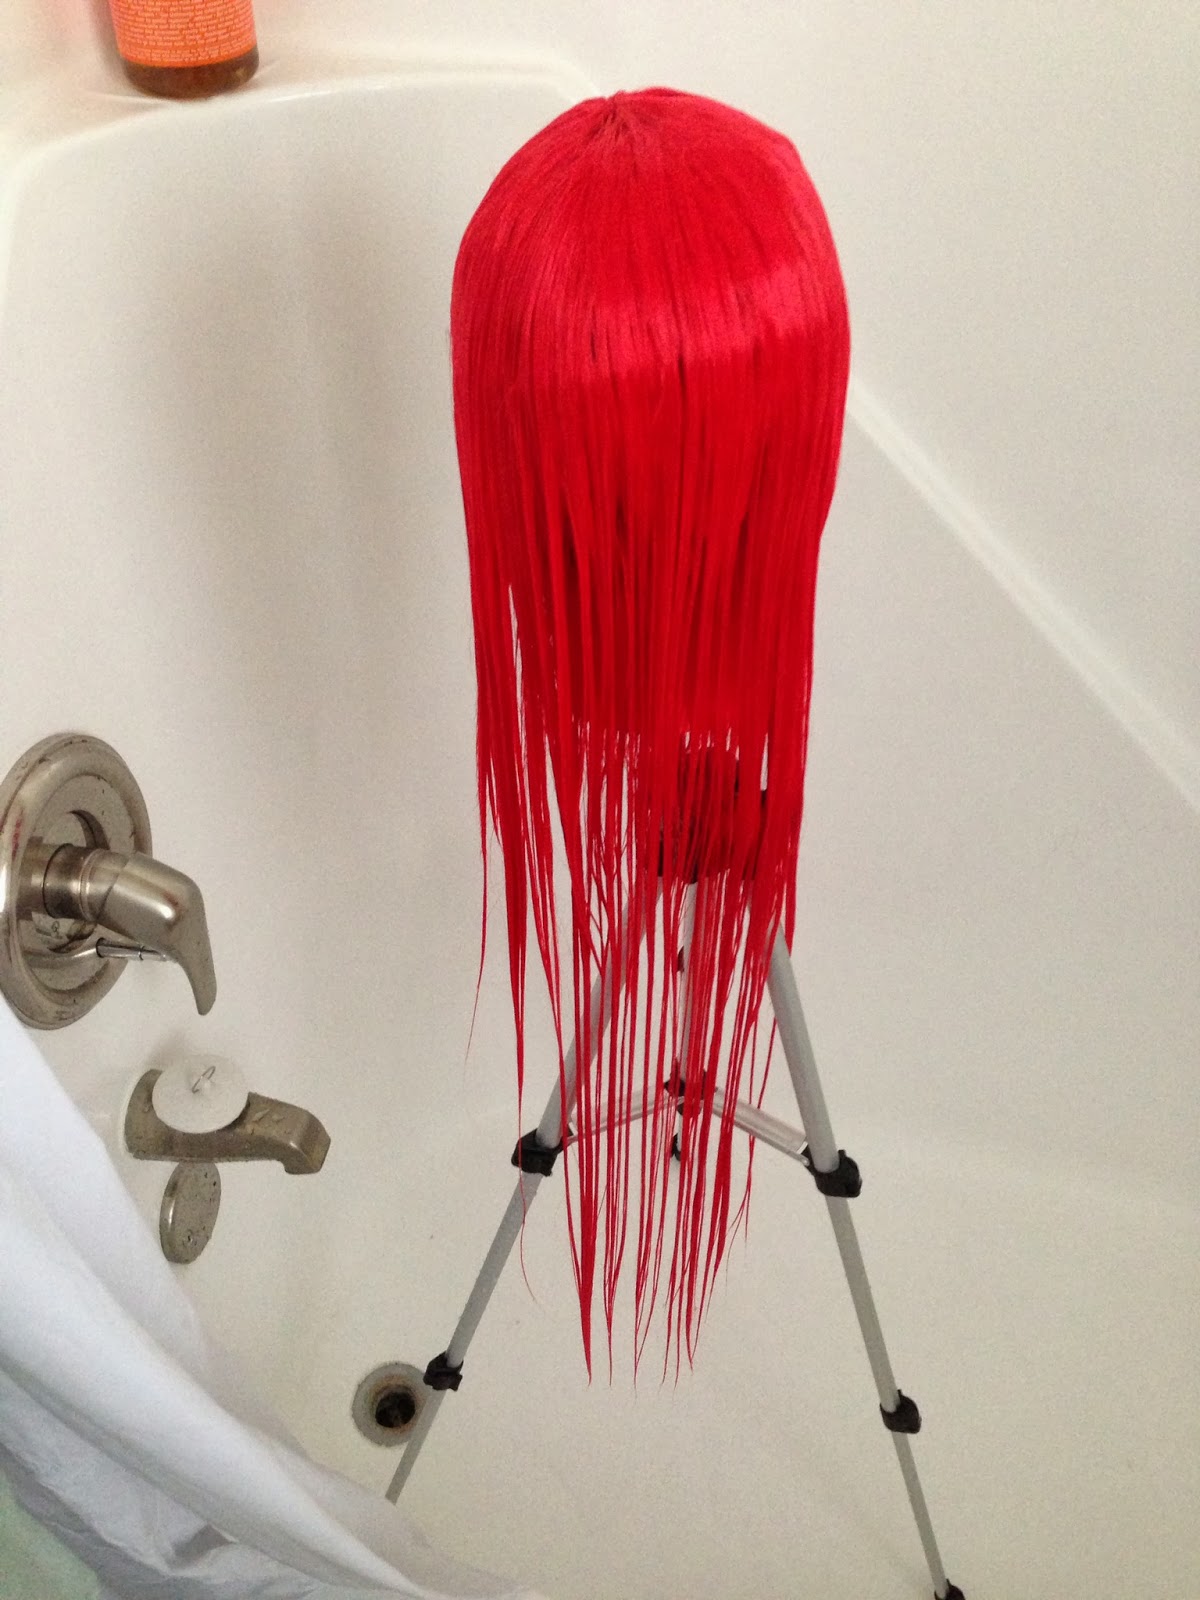
Start by putting the ball of tissue paper into the wig cap. The idea is that it helps keep the base rounded out (like a head) so that it doesn't lay completely flat & look totally whack when you put it on again later. To be honest, I hardly ever use the tissue paper when packing my wigs and I have never had an issue with them not fitting my head when I pull them out of the bag later. So, if your wig didn't come with a ball of tissue paper, I really wouldn't sweat it. But in the spirit of a thorough tutorial, I am going to pack it with the tissue paper anyway. (OvO)


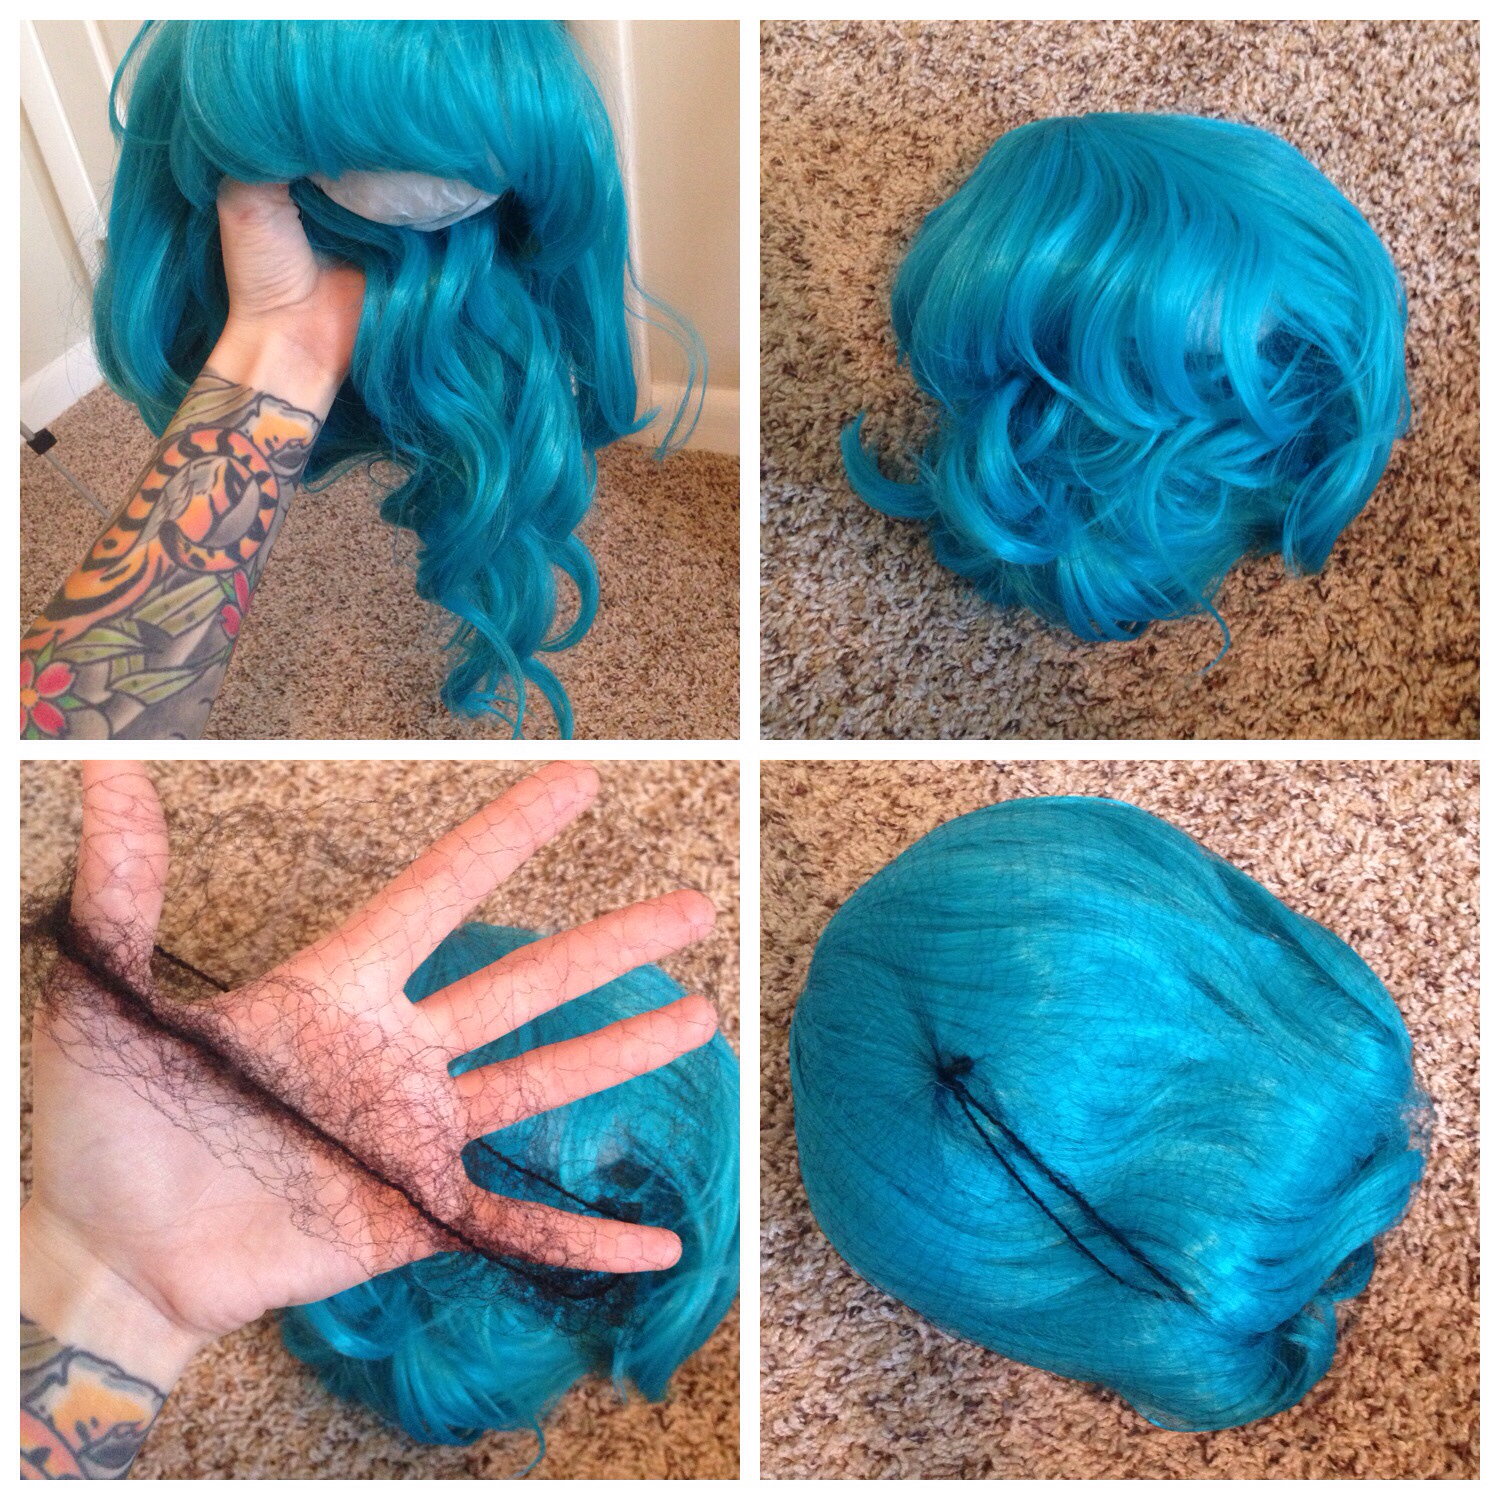
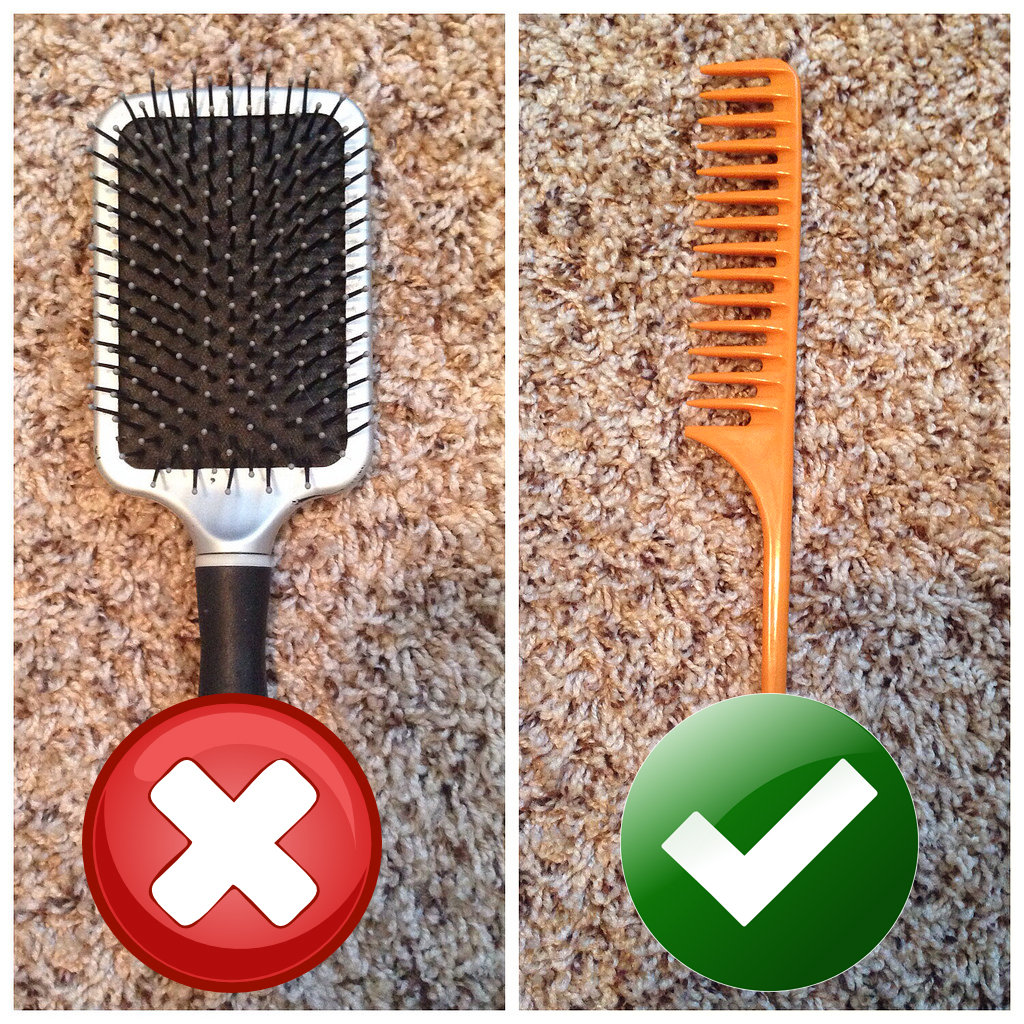
Then you want to wrap your wig back up in a wig net. This will help keep your wig contained and help it keep its style. If you just shove it back into it's bag without a net, you'll increase the risk of frizziness and total chaos when you pull it back out later. Sometimes you can get away with not using a net on short bobs or boy style wigs. I'm convinced that little wig fairies come in and steal wig nets, so if you are short a few nets, use them on your longer curlier wigs instead of short boy style. Got it?

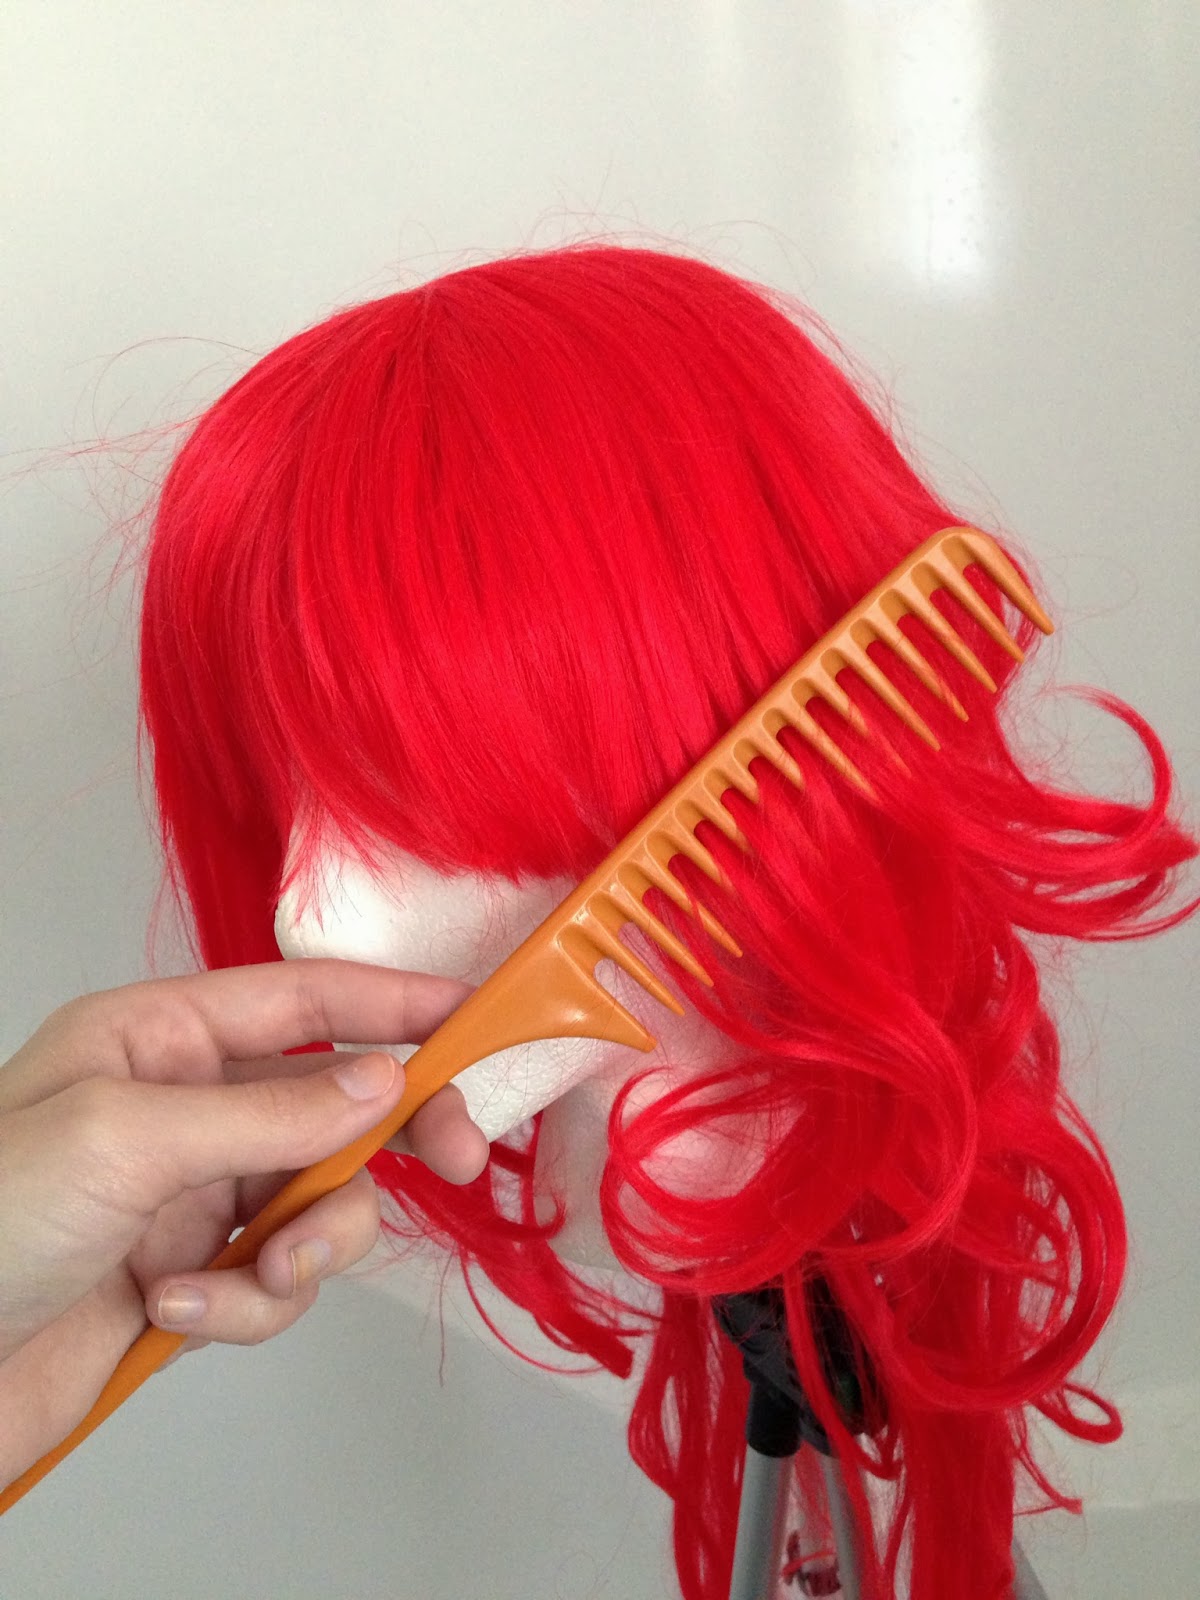
There are lots of different ways to get them back in the net, but I usually just like to gather the longest parts of the wig and carefully tuck them up into the cap. Some people do it other ways, but I find it easier to put the net on if all the curls, longer pieces, etc., are contained inside the base of the wig. 

Once your wig is tucked into a cute little ball, just stretch the net over the wig. Simple as that!


Next, it's time to pack it up! I always label my bags so that I can keep my wigs organized. This is the Gothic Lolita Wigs NeoClassic in Turquoise.

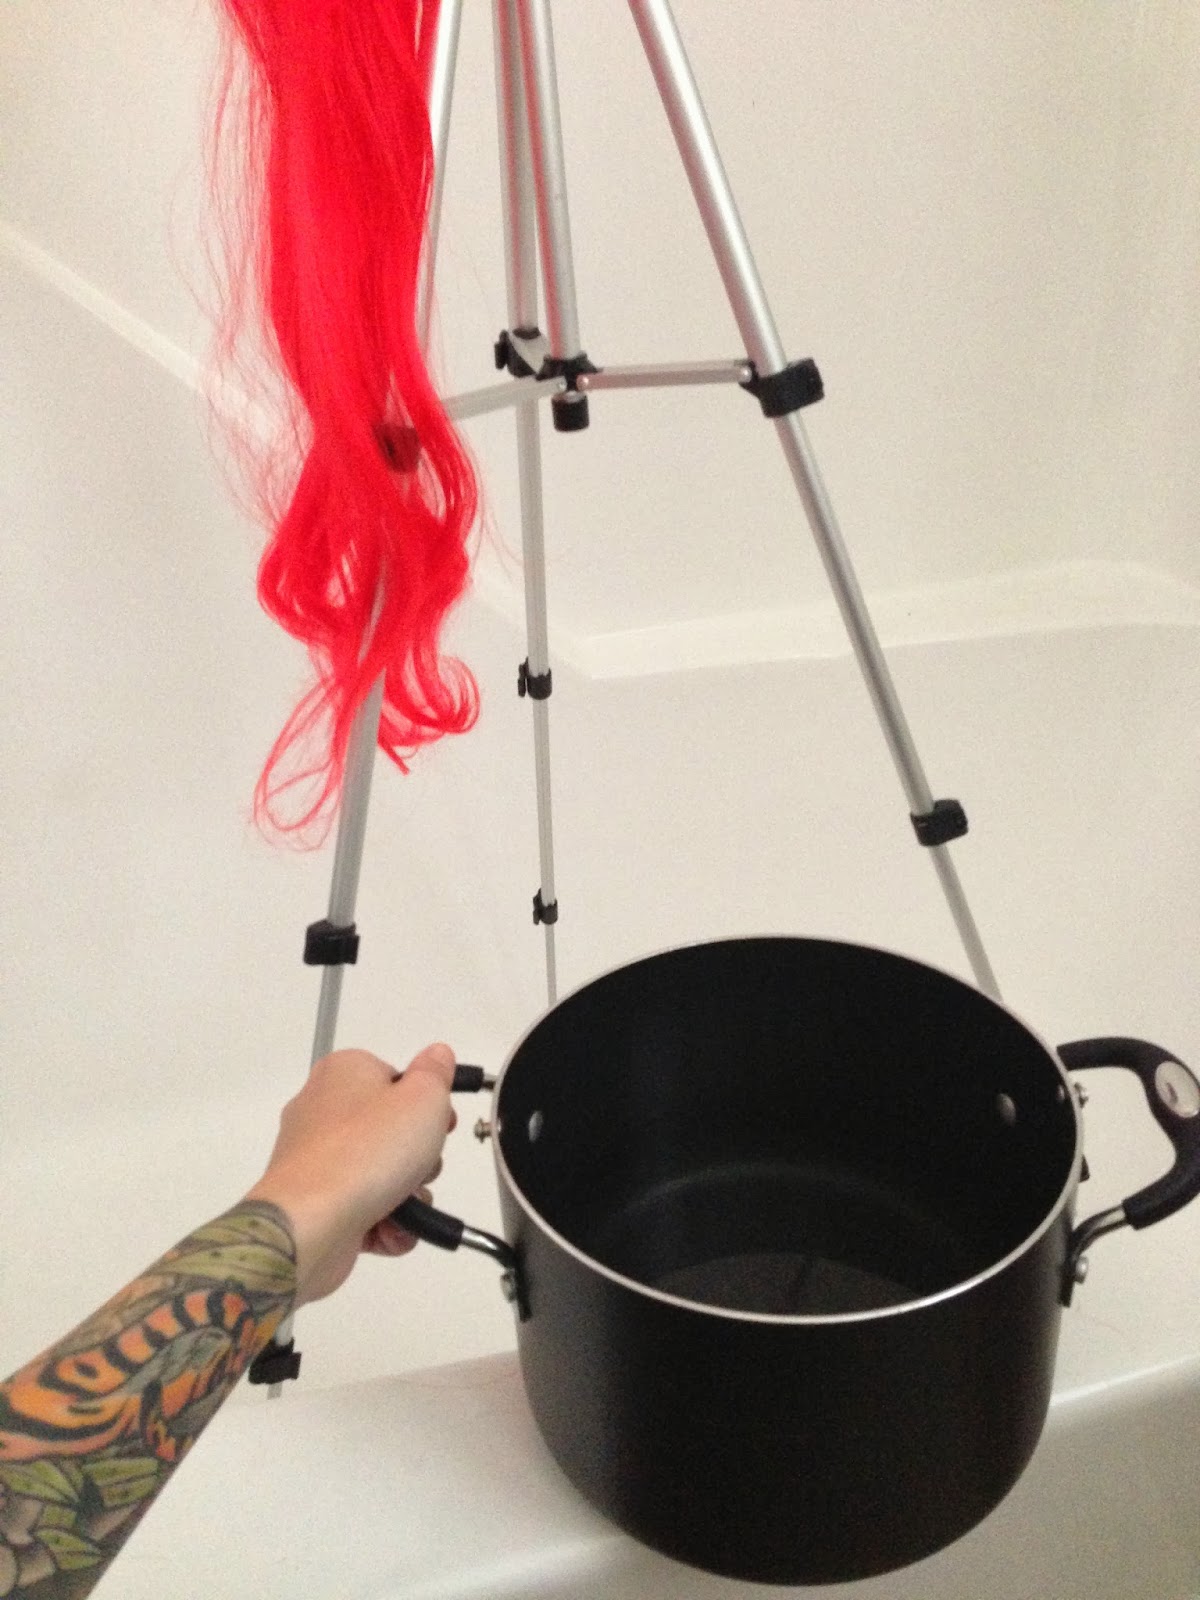
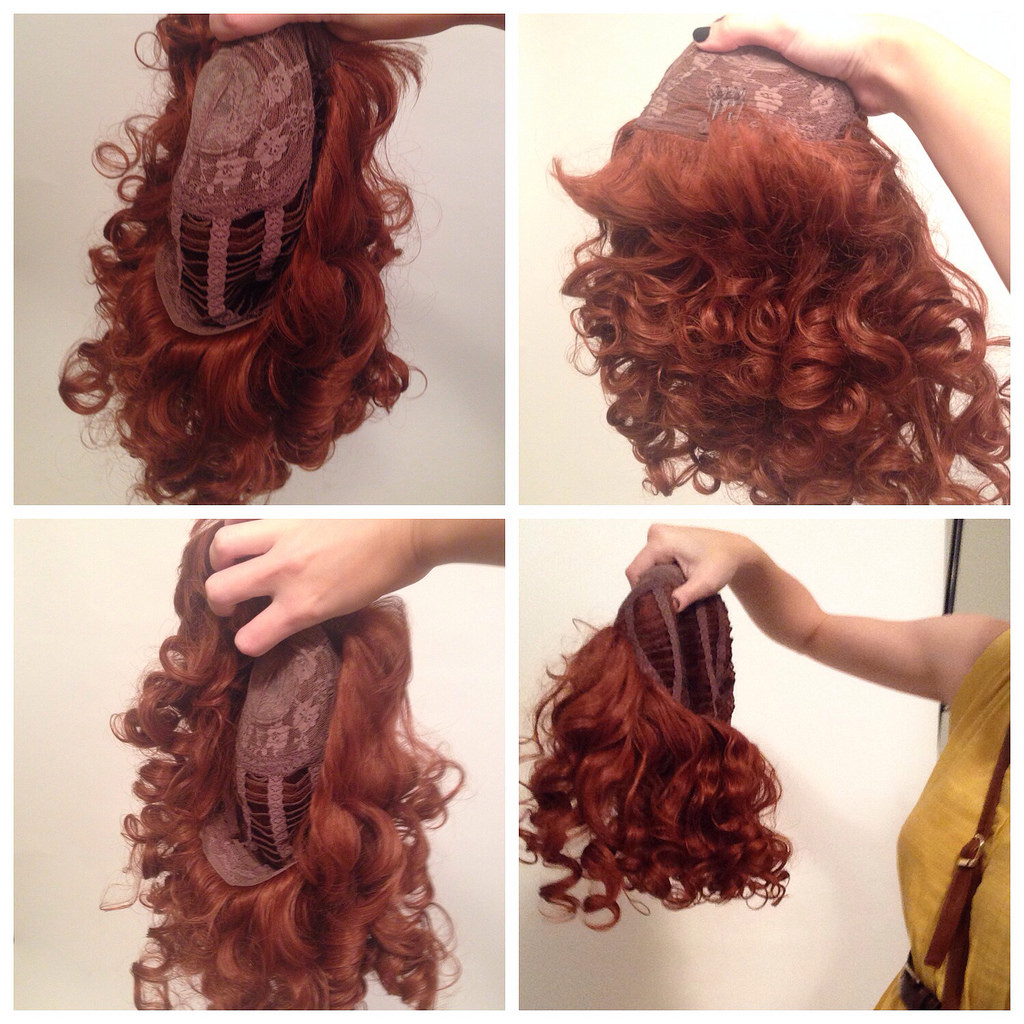
This step is pretty self explanatory in the graphic above, but in case you can't see it for whatever reason, I'll explain.
Take your netted wig and put it inside the cardboard. Put the cardboard in the bag.
I guess that wasn't much of an explanation XD

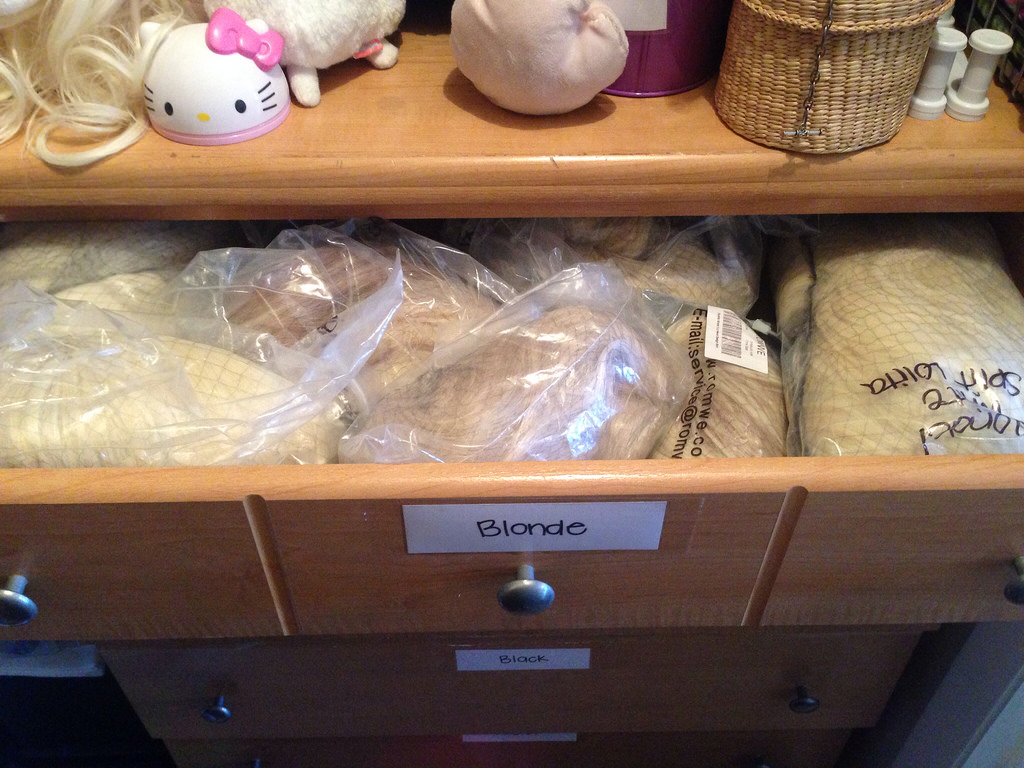
So, that's it!!! Then I put the wig back into its corresponding drawer. In the case of the NeoClassic Turquoise, its home is the "Bright" drawer.


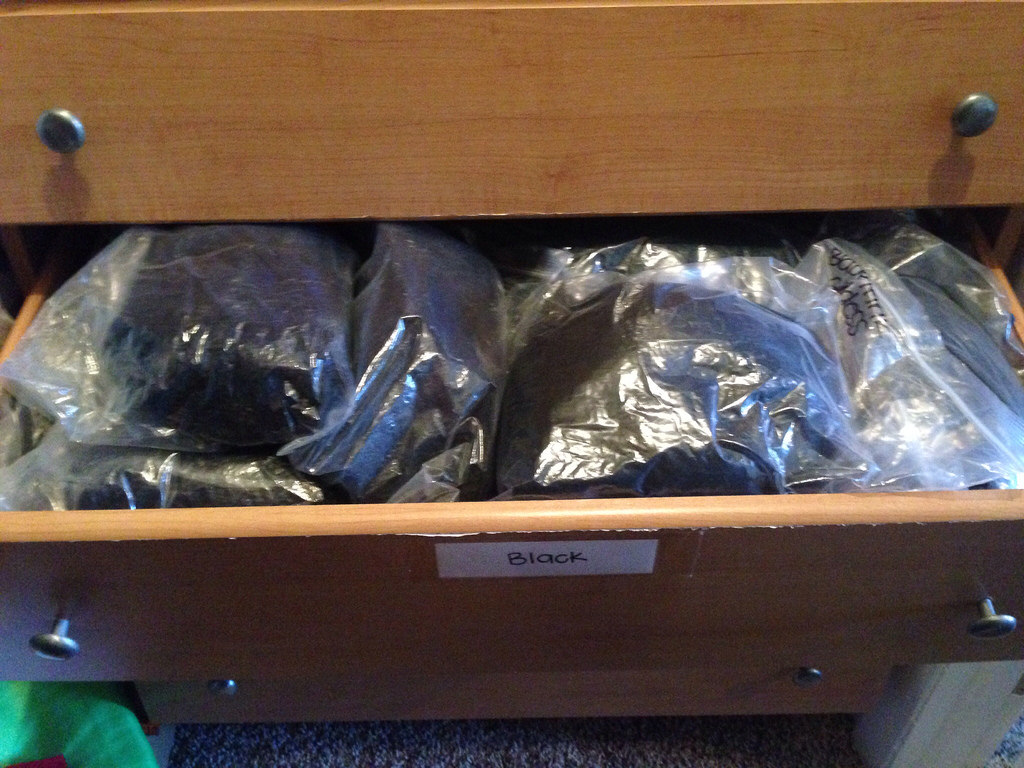
Now that I've teased you with a glimpse into the "Bright" drawer, I know you're curious about all of the other drawers.

Blonde:

Brown/Burgundy:

Black:

Pastel:

Bright:

Hahahah, okay. I know. I'm ridiculous and excessive.

Oh, and I definitely want to touch on this reallllllly quick.
I know a TON of you LOVE to display your wigs as storage. And why wouldn't you?? They are beautiful!


This is a fine way to store them, but there are two main things to beware of when doing this, especially if you don't wear them very often~
1. If your wig is sitting out on display, it is likely that it will collect dust while sitting out. Who wants dusty hair? Storing it in its bag will keep dust out of it.
2. IF YOUR WIG IS CURLY: If you keep your curly wig out on display, keep in mind that gravity is a thing. When there is a constant pull of gravity on the curls, they will start to lose their shape over time. Think about it. It makes sense. Straight wigs are a better choice for display wigs ;D


&&&&&&&&&&&&&&&&
That's it!!!!

I hope you learned something from today's #WigWednesday Wig Care Tutorial! Check back next week for
How to Restyle Tight Curls into Voluminous Loose Curls

xoxoxo


Wednesday, February 26, 2014

#WigWednesday: How to Brush and Restore Straight Wigs - Wig Care Tutorial

Hi everyone! Welcome to the second week of #WigWednesday Wig Care Tutorials! If you missed last week's quick tip, you can check it out here: How to Brush a Wig.

This week, we will be talking straight wigs! Ready? Here we go!

How to Brush and Restore Straight Wigs

My preferred method for taking care of straight wigs is with a wide-toothed comb. Because there are no curls to worry about ruining, it's much faster and easier to brush it with a comb as opposed to finger combing. The longer the wig, the easier it will tangle, so if you are trying to brush a very long straight wig, please be patient!! If you get frustrated and pull too hard on the hair, you can damage it, make the tangles worse, or pull the hair out.


Remember to start combing at the bottom! It is important to detangle the ends first or it's possible to make the tangles much worse than they were to begin with.

If after wearing or storing your wig it is not as straight as you like it to be, fear not! Wigs can be straightened! 
*All the wigs I use in my tutorials are by Gothic Lolita Wigs or RockStar Wigs, so this information is all based off of GLW/RSW quality and fibers. Cheaper quality wigs (eBay, etc.) may not react the same way.

For straightening wigs for the first time (or as many times as you want!), I recommend using the hot water method for a quick and easy way to get the wig uniformly straight. See my straightening tuturial here: 

But for touch ups after my straight wigs have been stored for a while, I use a hair straightener/flat iron on them. Make sure you read the product page from where ever you bought your wig to see the maximum temperature you should use on your wig. Most of the time, you can use the LOWEST setting on your straightener on synthetic hair. PLEASE do a test patch first on an underneath layer to test if your wig can handle the heat. If the hair burns or frays, do not continue with the straightener. 


Use a low temp! 140-180 degrees F.


Once you've done a heat test and found that your synthetic wig can handle a little bit of heat, you are ready to straighten! So pretty! *u*

Have fun! :)

Tune in for next week's #WigWednesday quick tip: How to Brush and Restore Curly Wigs!

xoxo


Wednesday, February 19, 2014

#WigWednesday Wig Care Tutorial: How to Brush a Wig

Hello wig lovers!!! Today I am here to kick off a brand new series on my blog for #WigWednesday. I'd like to help you with caring for your wigs to get the longest life out of them as possible. This is a topic I get asked about on my Facebook page so often that I felt it deserved not just a tutorial post, but a tutorial series, so I hope you find it informative! Check back every Wednesday for the duration of the series for more wig care quick tips!

So, you love your Gothic Lolita Wig or RockStar Wig. I get it. We all do.
Even though the quality is top notch, you wear it all the time (through high winds and summer humidity and an accidental rain storm) and it's starting to look a little beat up. Can you restore it or is it trash?

Before you toss your perfectly good wig, try taking a few steps to restore it to its former beauty.

For the launch of the series, we are going to start with one of the most basic tips of wig care: How to Brush a Wig. I know it may seem simple to you seasoned pros of wig care, but for many, this is a quick way to ruin a wig. Lots of people don't even know that there is a wrong way to brush a wig! Each Wednesday with cover a different topic, and after today, they will be much more specific! So let's get to it!

How to Brush a Wig

There are a few ways to properly and safely brush your wig. First of all, let's start with the basics. Your tools!


NEVER, NEVER, NEVER brush your wig with a standard hair brush that you would brush your natural hair with. It will damage the fibers and can completely ruin your wig. Only use a wig brush or a wide-toothed comb.

There are many ways to brush wigs, but my favorite ways are to brush with a wide-toothed comb and finger-combing. I like using a wide-toothed comb over a wig brush because it gives you more control and they are very inexpensive and readily available at lots of stores. Finger-combing (brushing with your fingers) is nice for daily upkeep because it's easy, you always having your fingers with you, and you can style and finger comb at the same time. The downside of finger-combing is that it is harder to get out larger and tougher tangles.

The best way to brush a wig is from the bottom up. Start with detangling the ends of the hair, and SLOWLY work your way up to the top of the wig (brushing downwards- NO BACKCOMBING! unless you want your wig to be forever a poof ball). Detangling a badly knotted wig requires a lot of patience. You can also use wig conditioner to help detangle wigs. I don't have experience with wig conditioner, so I'm not going to talk about that, but just know that such a product exists for you to experiment with. Buying a bottle of wig conditioner is cheaper than replacing your entire wig.

I like to lightly brush & care for my wig after EACH WEAR before storing it. This helps them keeping nice and prevents build up of tangles that become harder and harder to get out.

And that's it! I told you they were QUICK tips! Check back next Wednesday for:
How to Brush and Restore Straight Wigs

♡♡♡♡♡♡♡♡♡♡♡♡♡♡♡♡♡♡♡

Sunday, September 22, 2013

How to Straighten a Synthetic Wig Using the Hot Water Method | Daily Style Post

Hey guys! Today I want to do something a little different. Tutorial time!

A few months ago, I decided that I wanted to straighten my red Empress wig from Rockstar Wigs. Having always relied on my flat iron, I sat down to watch a movie and straighten a super curly wig on low heat. For this method, you need a hair straightener and more patience than I have. 

After nearly two hours, it looked like this:


Not bad, but not as straight as I had wanted. I would hold the straightener on the ends as long as I dared and they still curled despite my efforts. When straightening high temp synthetic wigs (like wigs from Gothic Lolita Wigs and RockStar Wigs), you have to be really careful not to melt the fibers because there is no way to get them back once they are damaged from heat.

Fast forward to September. I pulled my Empress wig out of the bag that I store it in and... Wtf! It's curly again!!! Noooo! So much effort wasted!  How is this even possible?! 


Time to try another method. I had always heard of the hot water method but had never tried it myself. Now I will never straighten any other way. It is soooo easy! 


First, grab a tripod or some sort of stand that you will be able to attach your foam head to that will allow your wig to hang completely straight when wet. When I thought of using my regular tripod, I got nervous about drenching it in hot water. However, being a photographer, I fortunately have spare tripods laying around. I picked my cheapest tripod (I think it was like $15USD) for my hot water tester tripod. I'm sure the water wouldn't damage a tripod but I didn't want to take the risk with my nicer one.


Turn the handle of the tripod straight up. It conveniently fits a foam head perfectly and securely. Insert the head onto the handle. 


Put the wig on the head. Attach with pins so it doesn't slide off the head during the process. Brush all the knots out of the wig with a wig brush or wide-toothed comb.


Put the tripod and wig in the bathtub. You'll be drenching the thing so you'll want to have it somewhere safe for water.

Fill a pot (or kettle, if you live somewhere that people have kettles XD) with water and put it on the stove. You'll want to keep an eye on it so the water gets hot, but not so hot that you will completely melt the wig. Between 180℉ and 185 is a good temperature.


I'm using a meat thermometer because I don't have a regular thermometer hahah.. Not even sure why I have this. I've been a vegetarian for ten years. Hahaha..  >.<

Once the water is at the ideal heat, say your final goodbye to your wig's curls.


You want to make sure the wig is completely soaked. It would be fine to just start with pouring the water over the top of the wig, but I quickly dipped the ends in the water and swished it around really fast to make sure they got wet. This particular wig style has two long pieces that are much longer than the rest of the wig, so that was a precaution I took to ensure the pieces got wet. 


Then you just pour the water over the top of the wig and watch the magic happen. The heat allows the fibers to be reshaped right before your eyes. Remember, the wig must hang completely straight for the wig to dry straight. It may take a few pots to get the wig completely soaked. I think I heated and poured three pots for this wig.


Never brush a wig when it's wet!!! You can mess up the fibers.

Then you just leave it alone and let it dry for a few hours. Allow the wig to dry fully before taking it off the stand. You don't want to risk messing it up because you're impatient. Maybe you can watch a movie or go get ice cream while you wait. :3

And then.... You revisit your wig a few hours later..... And behold... The straight beauty....


!!!!!!!!!!!!

It's soooo pretty when it's straight!!! The layers! They are amazing! It's like a totally different and new wig. 

Check out some before and after shots of the Rockstar Wigs Empress wig in Red


By the way, this wig is on clearance from Rockstar Wigs for $34.50. Get it before it's gone forever!!!

After straightening and falling in love with this wig all over again, I put this outfit together based around the wig. How about this for a Tutorial x Daily Style combo post?! 


Outfit Rundown

Hair: Rockstar Wigs Empress in Red

Lashes: Dolluxe Lashing Out Loud x Underlash B
See my review of these under lashes here:

Contacts: Pinky Paradise Super Size Nudy in Green
See my review of these contacts here: 

Necklace: Tobi Spike Gang Wrap Bracelet (worn as necklace)

Top: Newbreed Girl Tokzilla Girls Tee (altered into a tank)
I don't think they sell this tee anymore, but they have the same print in a hoodie which I like even better!!! Hoodies are a girl's best friend.

Arm Band: Dollface Deconstruction (actually a hair piece)

Cami: off brand/unknown

Shorts: off brand/unknown 

Sock: non-active eBay shop

Boots:  T.U.K. Red Leather Combat Boots


Watch out! We've got a tough guy over here! *growl*
~~~~~~~~~~~~~~~~~~~~~~~~~~~~~~~~

I hope you enjoyed this tutorial and Daily Style post! Are you going to straighten your wigs with the hot water method? I'd love to see your straight wigs in the comments or on my facebook page! xoxoxo